In this post I will show you how to install, setup and configure Hyper-V virtualization tool from Microsoft in Windows 10. There are other popular tools available such as VMware Workstation, VMware Workstation Player and VirtualBox which can be used instead of Hyper-V.
Below is the YouTube Video which describes the process. You can start by watching the video. Rest of the blog discusses the steps in detail.
Hyper-V Installation Prerequisites
The Hyper-V role can be enabled on these versions of Windows 10:
- Windows 10 Enterprise
- Windows 10 Professional
- Windows 10 Education
The Hyper-V role cannot be installed on:
- Windows 10 Home
- Windows 10 Mobile
- Windows 10 Mobile Enterprise
To install Hyper-V, your computer must meet the below requirement.
- 64-bit Processor with Second Level Address Translation (SLAT).
- CPU support for VM Monitor Mode Extension (VT-c on Intel CPU’s).
- Minimum of 4 GB memory. As virtual machines share memory with the Hyper-V host, you will need to provide enough memory to handle the expected virtual workload.
The following items will need to be enabled in the system BIOS:
- Virtualization Technology – may have a different label depending on motherboard manufacturer.
- Hardware Enforced Data Execution Prevention.
Note: The above requirement might seem confusing to you. What all the above means is that you should have Windows 10 Pro, Enterprise or Education edition installed on your system and your CPU or processor must support Virtualization Technology.
To find if your processor supports Virtualization Technology or not, you can Google search the specification of your processor or refer to my post which explains how to find out if your CPU supports Virtualization either Inter VT-x or AMD-V.
Please note that VMware Workstation, VMware Player or Oracle Virtual Box does not require Virtualization Technology if you want to run 32 bit OS. However for 64 bit OS, you still require Virtualization technology for both VMware and VirtualBox. So don’t loose hope if your Processor does not support Virtualization Technology. You can use VMware Workstation or Virtual Box as alternatives to Hyper-V to run 32 bit OS.
Below are the steps to enable Hyper V in Windows 10
Step 1 – Find out if your System is Hardware compatible, that is if CPU Supports Virtualization Technology
There are a couple of ways to easily find out if your processor supports Virtualization Technology. I have created a post which explains in details how to find that out. Please refer to my post How to find out if Intel VT-x or AMD-V Virtualization Technology is supported in Windows 10, Windows 8, Windows Vista or Windows 7 machine
Step 2 – Enable Virtualization Technology either Intel VT-x or AMD-V
To enable Hyper V, system must have Virtualization Technology Enabled in BIOS. For AMD processors, Virtualization is enabled by default, but in the case of Intel, VT-x may not be enabled by default. So, there are steps to be followed to enabled Intel VT in BIOS or UEFI. Please follow my post on Step by step guide to enable Intel VT-x or AMD-V in BIOS or UEFI in Windows 10 and Windows 8.
Step 3 – Go to Apps and Features
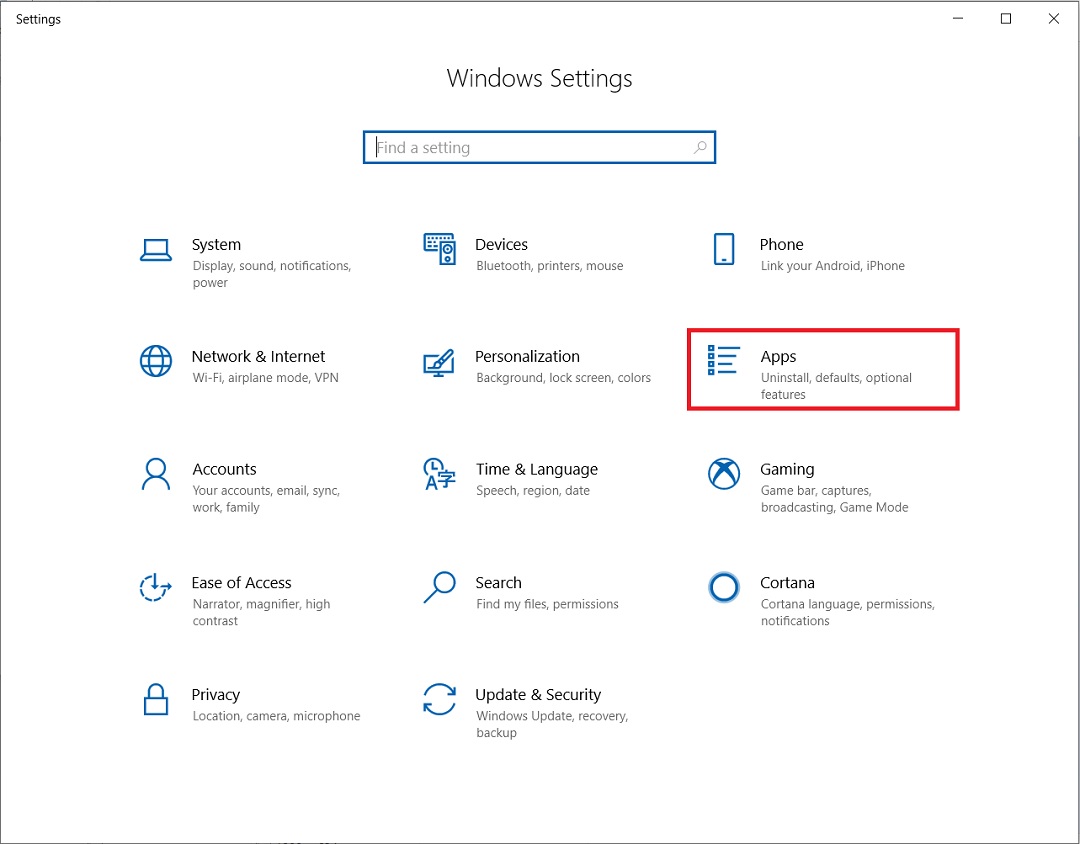
Go to Start Menu -> Click on Settings
. You will see Windows Settings Dialog box.

Windows 10 Start Menu Settings Button Screenshot
In Windows Setting Dialog box click on Apps
Windows 10 settings dialog box
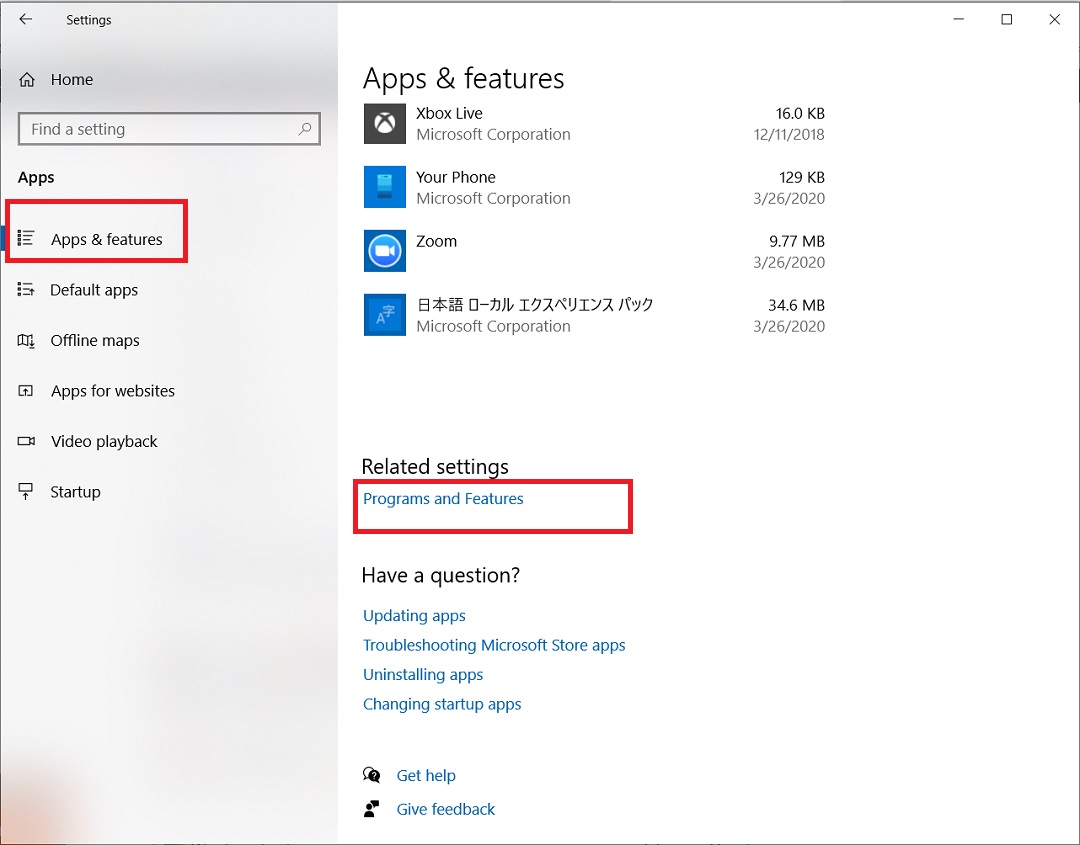
Step 4: In Apps and Features Dialog box and scroll to the bottom
Windows 10 – Apps and Feature
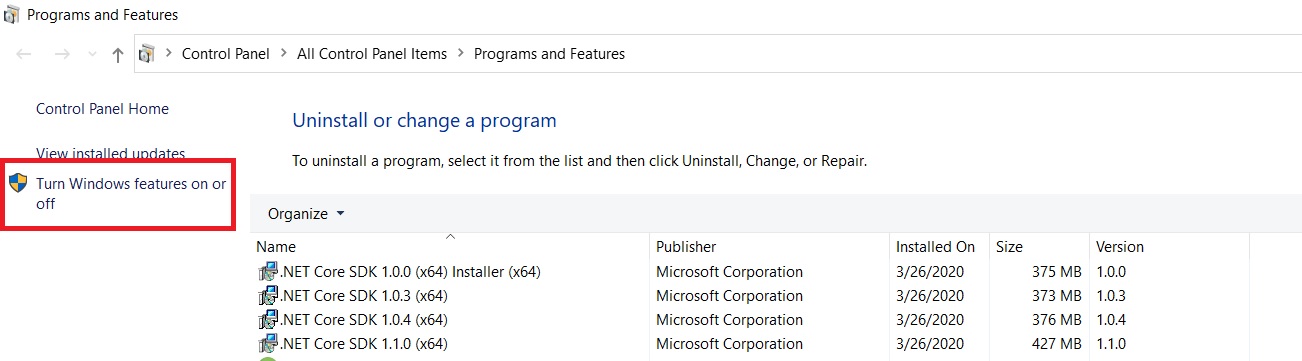
At the Bottom, you will see program and Features. Click on it. In the Program and Feature windows, you will see Turn Windows Feature On or off. Click on it.
Windows 10 – Program and Features
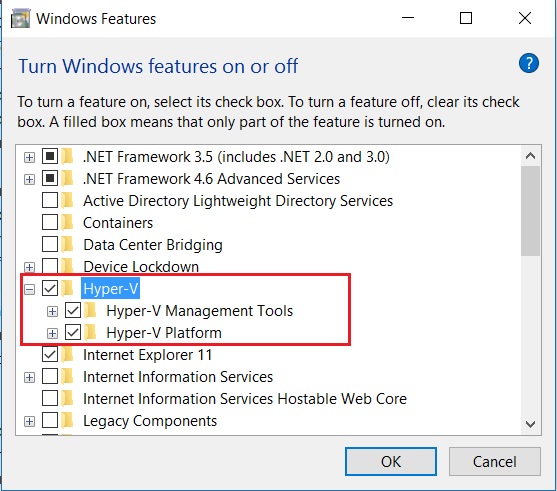
Step 5: In Turn Windows features on or off dialog box, check Hyper-V option as shown below
Windows 10 – Turn Windows feature on or off screenshot
Click OK and wait for the process to complete.
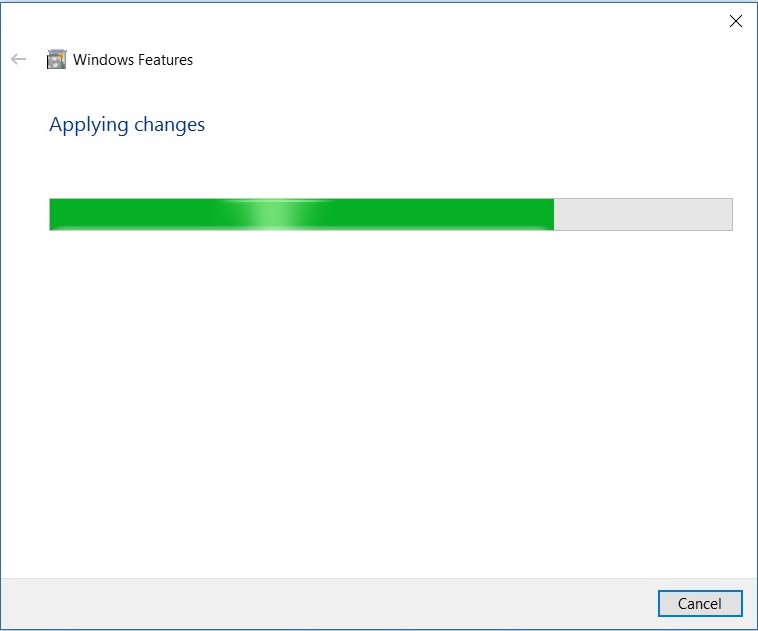
Windows 10 Add Features- Applying changes dialog box screenshot
At the end you will be asked to restart your computer. Please go ahead and restart your computer for the rest of the process to complete
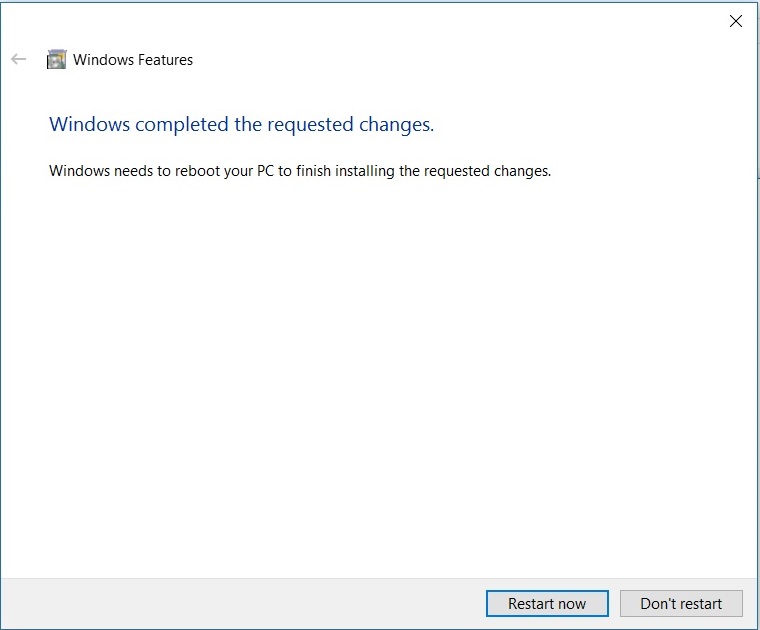
Windows 10 Add Features- Restart dialog box screenshot
Step 6- Now you will be able to see Hyper-V manager in Start Menu under Windows Management tools.
You can also search for Hyper V in Windows 10 task bar. If you see it, that’s it you are done.
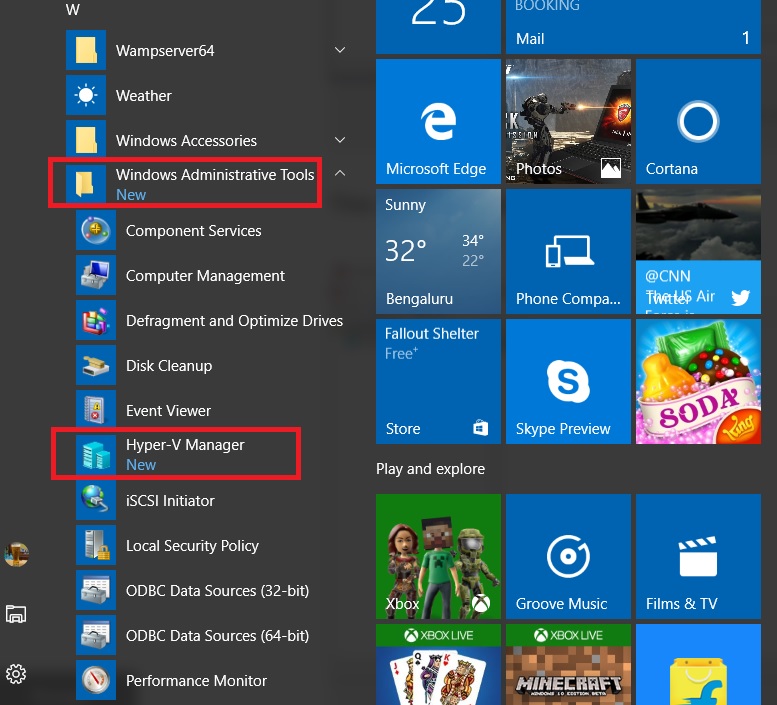
Windows 10 Hyper V manager start menu
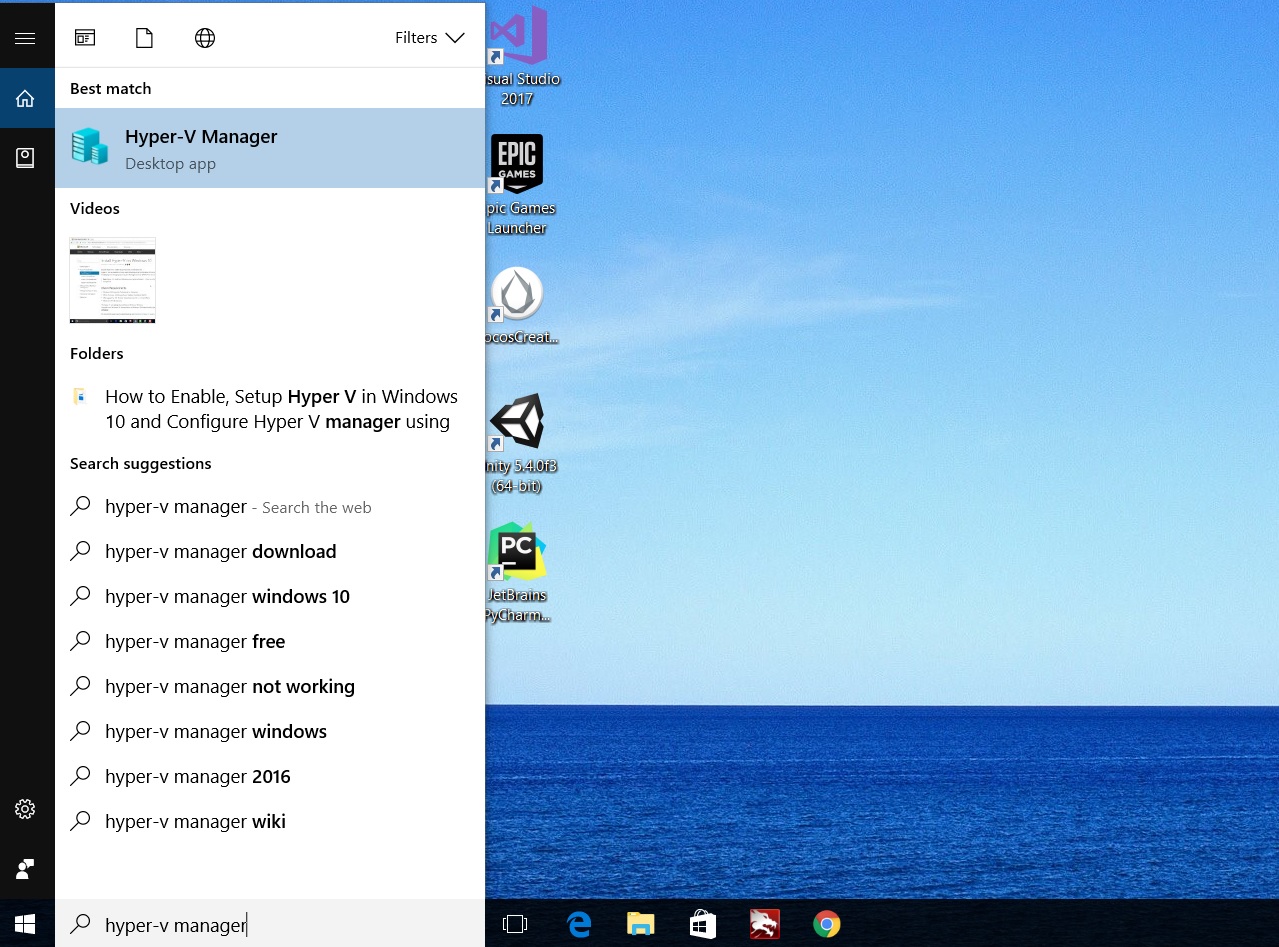
Windows 10 Hyper V Manager taskbar search
Step 7- Click on Hyper V manger to open Hyper V manager.
This is the place where you create, start, stop and configure Virtual Machines in Windows 10.
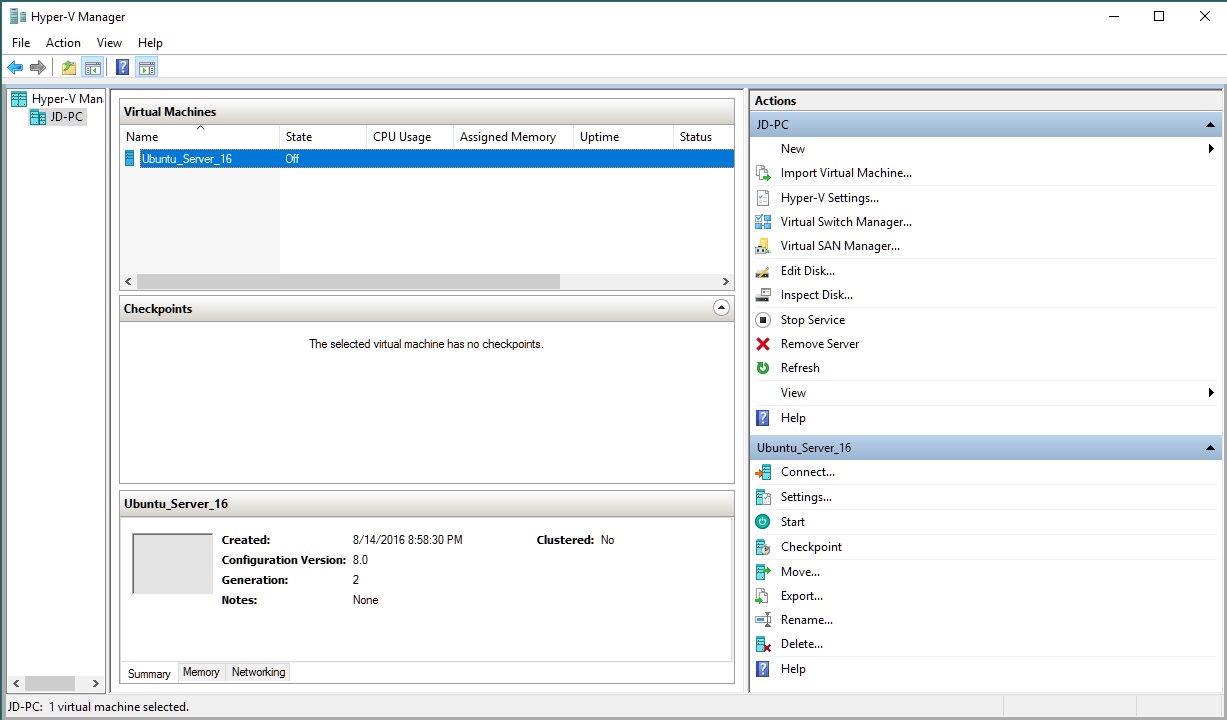
Windows 10 Hyper V Manager
If you dont see Hyper-V manager in the start menu, or not able to open Hyper-V Manager, it mean that you have not updated your windows 10 Machine for a log time, you might have have to configure MMC console which is described in the next section
Configure MMC console to use Hyper-V Manager (Optional)
If you have not updated your Windows 10 machine, this step might be required.
After the process completes, there are additional steps that needs to be done to configure Hyper V manager.
Step 1- Open command prompt and type mmc and hit enter. This will open MMC console
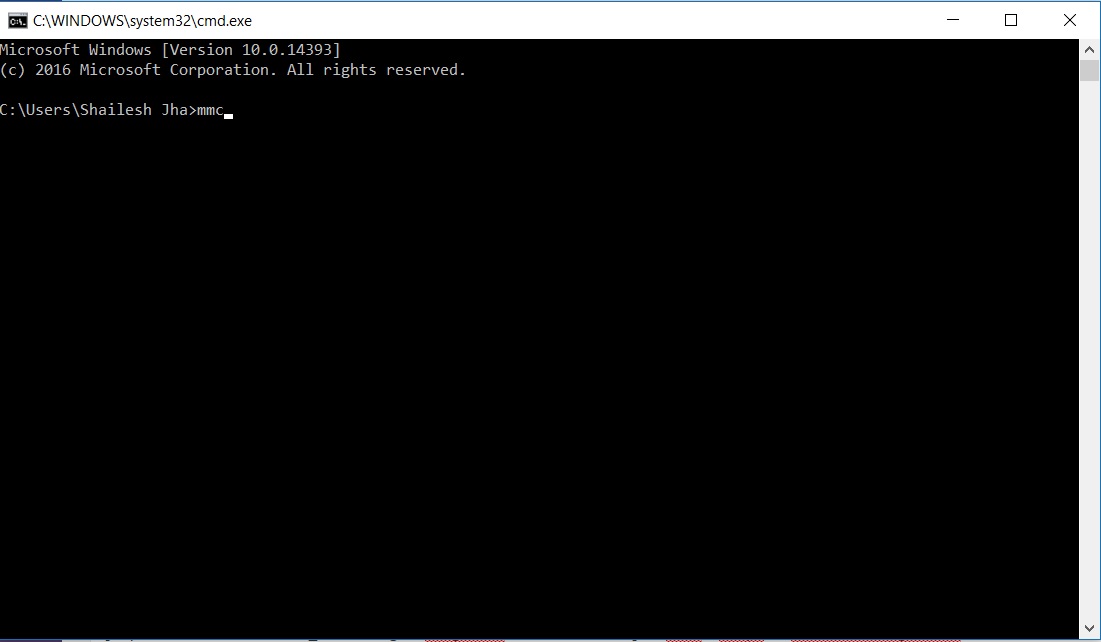
windows 10 Command Prompt
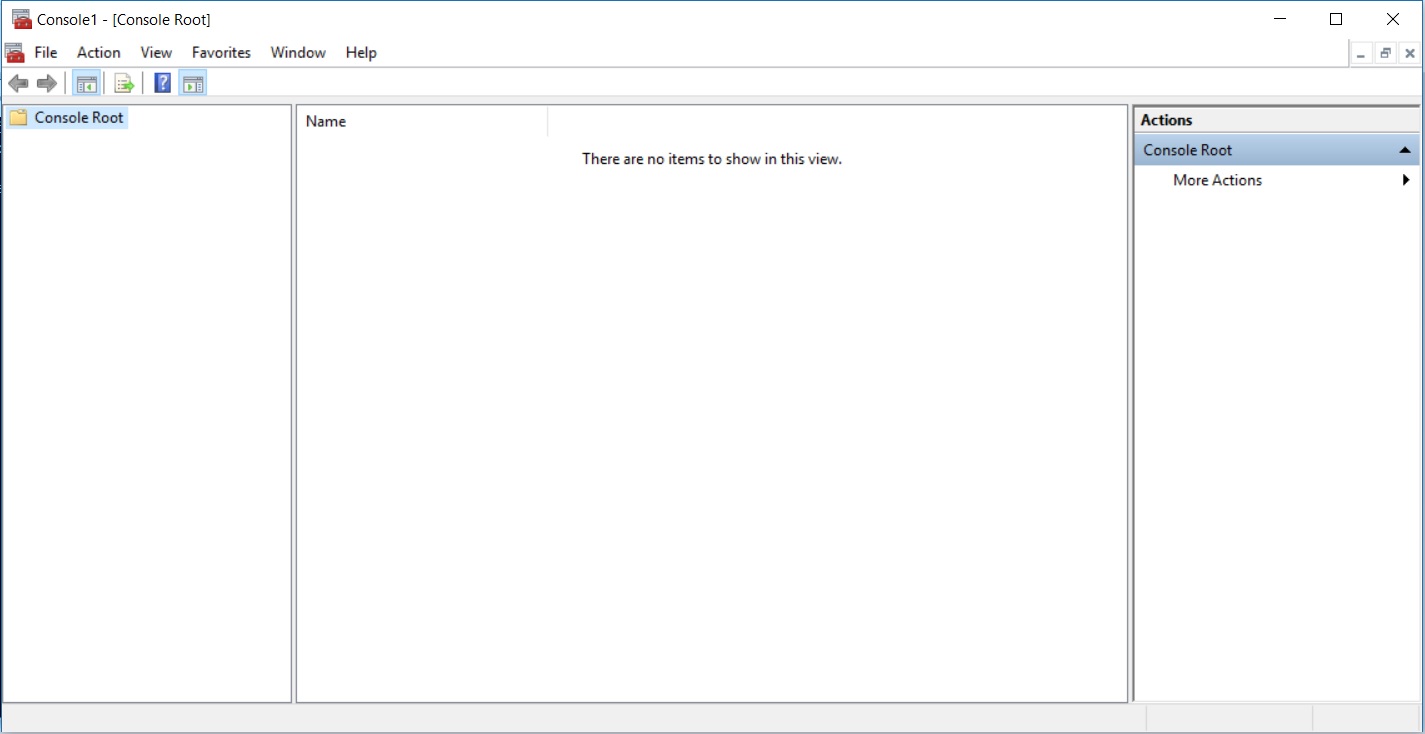
Windows 10 MMC Console
Step 2- In MMC console – Add Hyper-V snap-in
In MMC Console Goto File->Add-Remove Snap-in
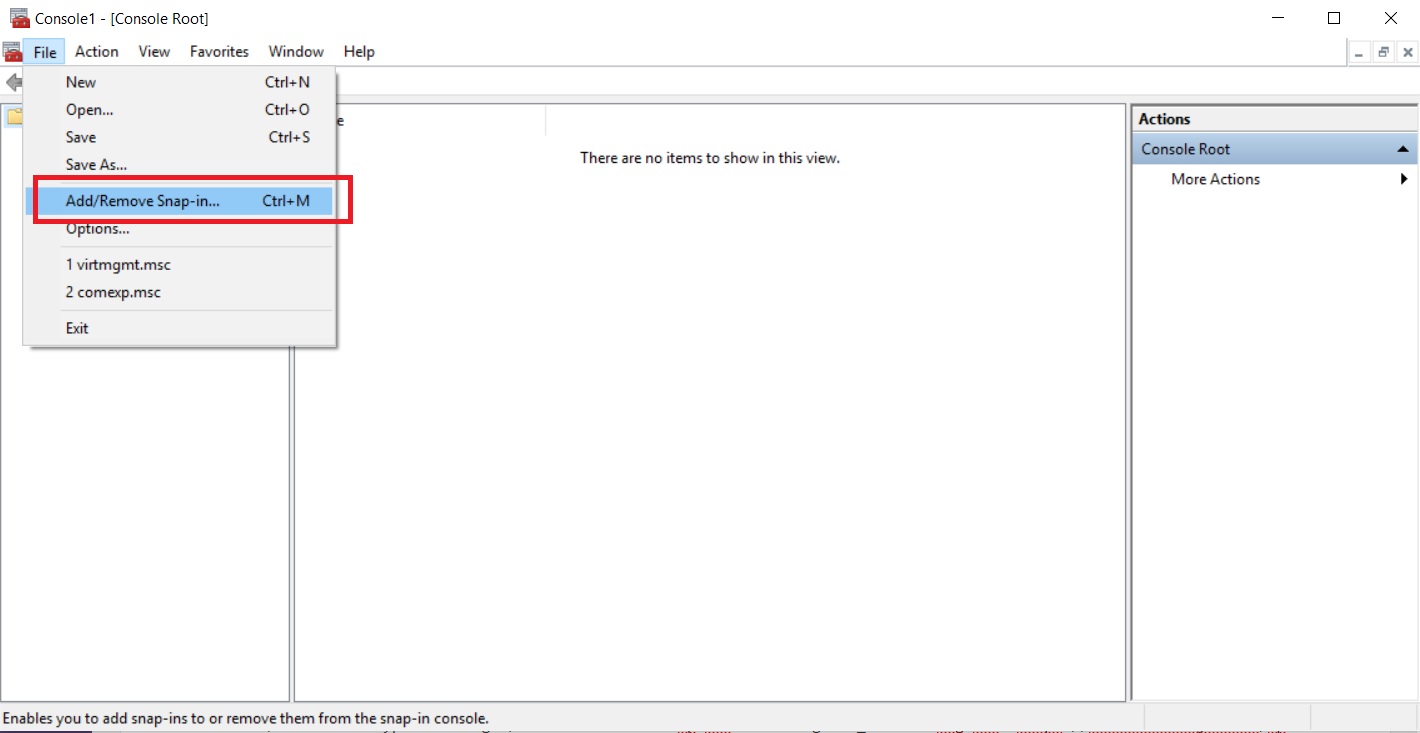
10 MMC console file menu add remove snap ins dialog box screenshot
In Add Remove Snap in Dialog box, select Hyper V, click add and click OK.
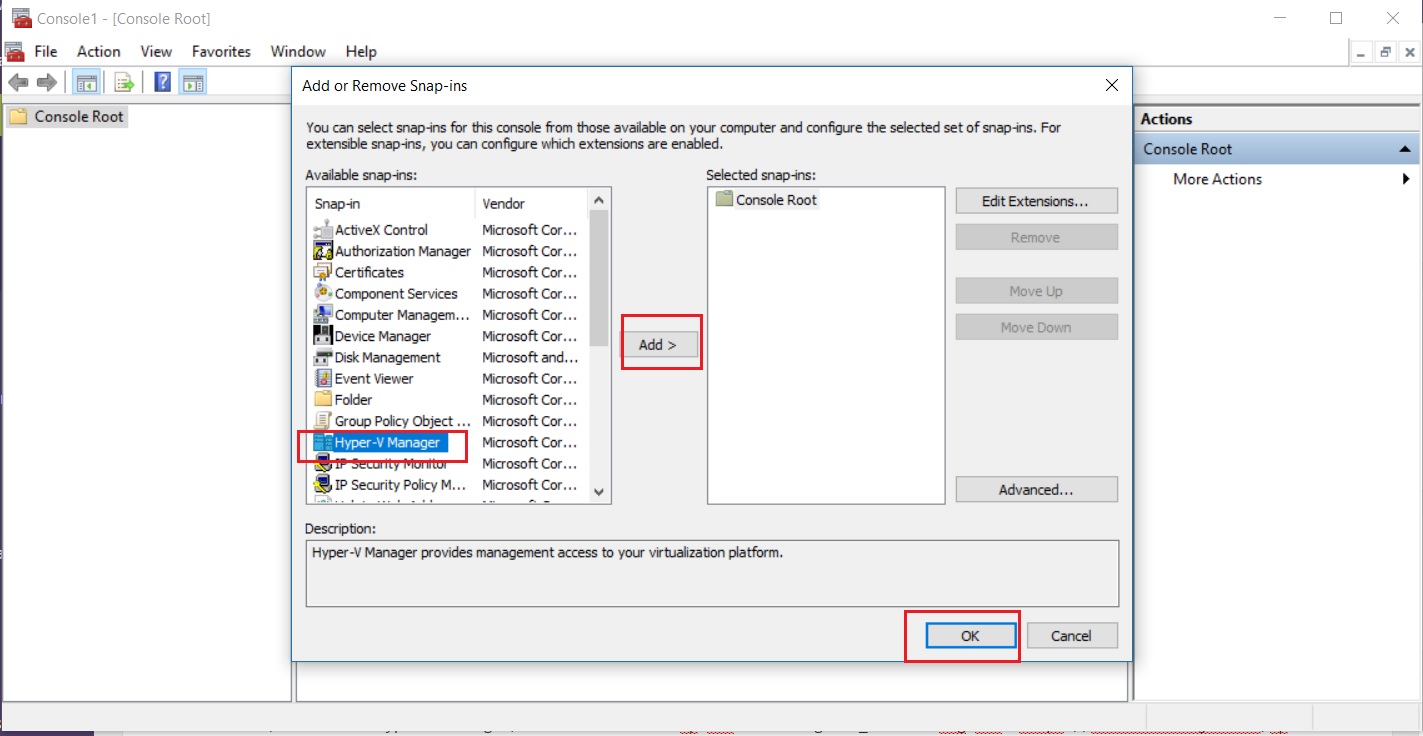
Windows 10 MMC console add remove snap ins dialog box screenshot
This will add Hyper V in Console root.
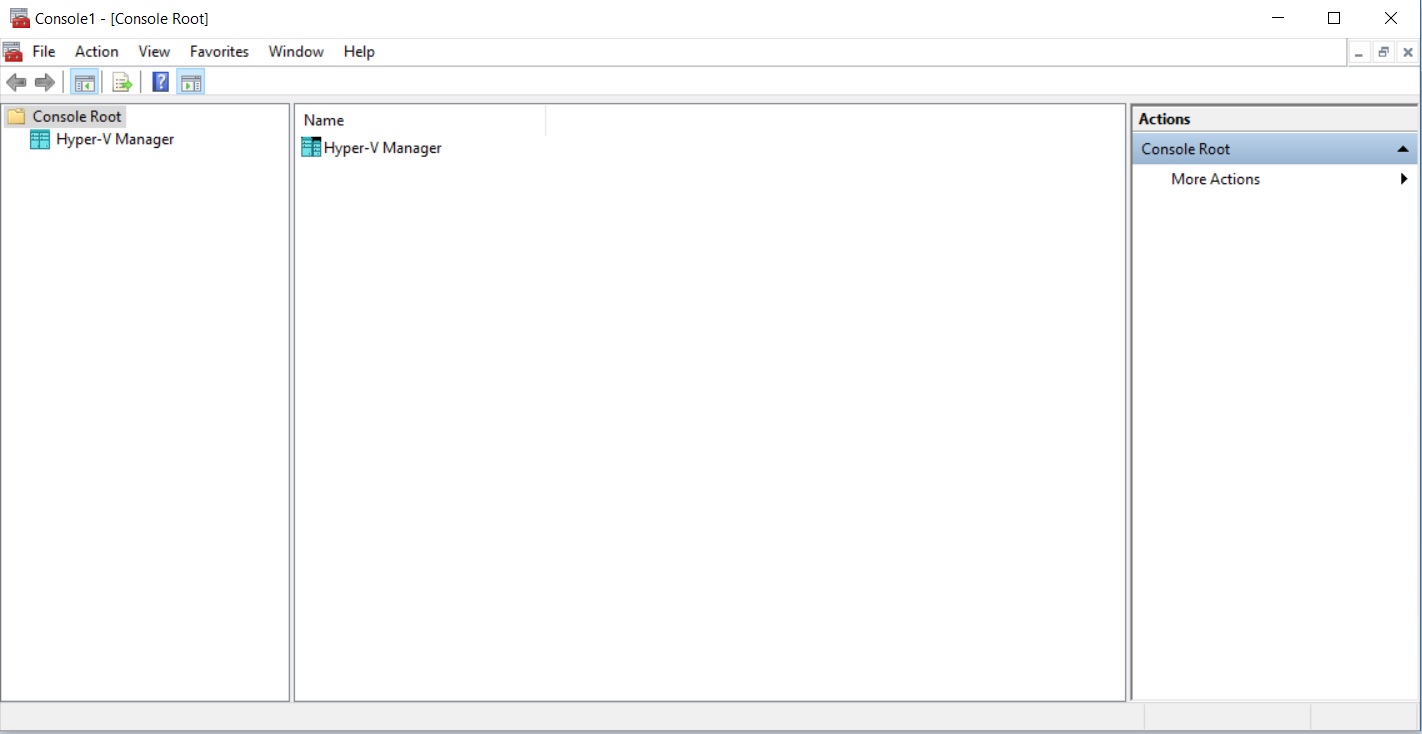
Windows 10 MMC console root Hyper V snap in added screenshot
You can close MMC Console now. You will be asked to save. Quit without Saving.
That’s it, you are done. Thanks for visiting my blog.