In this blog we will install a single node Kubernetes cluster using Minikube. Minikube is a tool that makes it easy to run Kubernetes on your local machine. Minikube runs a single-node Kubernetes cluster inside a Virtual Machine (VM) on your laptop that allows users to try out Kubernetes or develop and deploy applications on it for testing. Minikube does not provide a production grade Kubernetes setup, as such should not be used in production.
For this blog post, we will be using Minikube version 1.8.1 and Kubernetes version 1.17.
Prerequisites
According to the official Kubernetes website, virtualization support is required to run minikube and Kubernetes cluster.
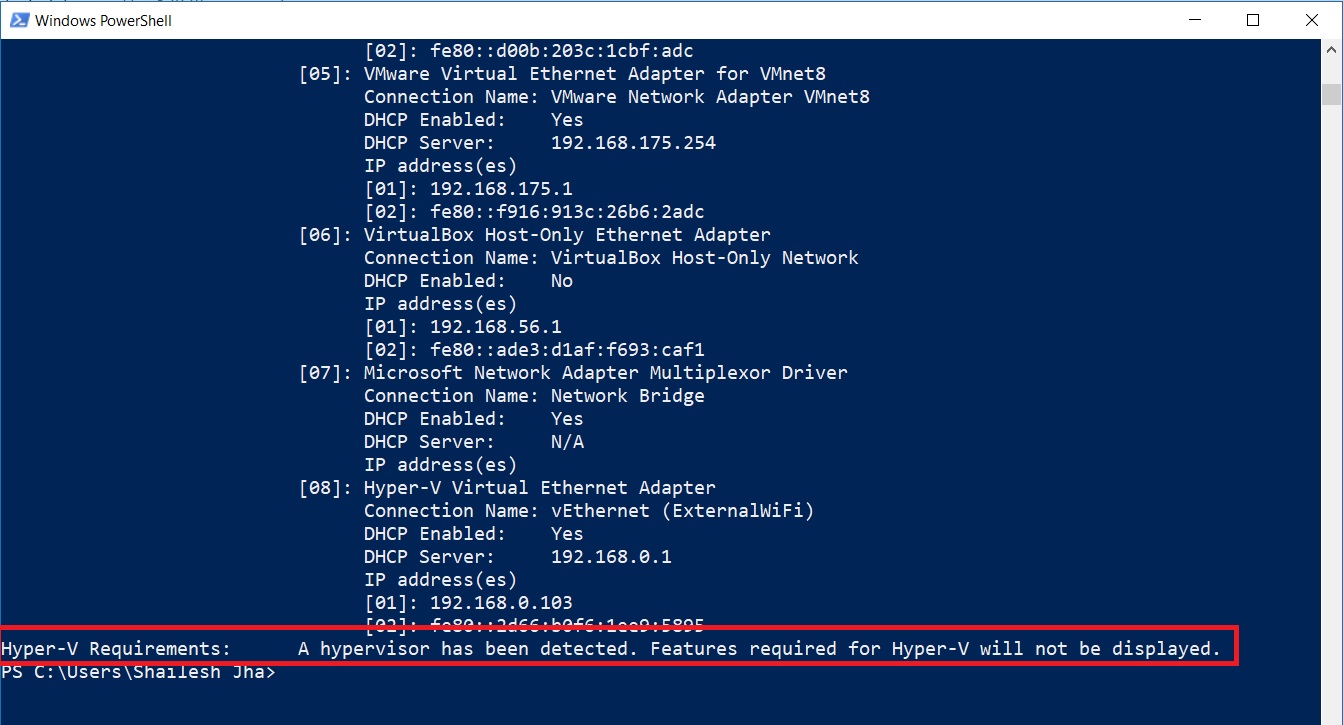
To be sure that Hyper-V and Virtualization is enabled, please run the following command in powershell or command prompt:
systeminfo
At the end of the output, if you see:
Hyper-V Requirements: A hypervisor has been detected. Features required for Hyper-V will not be displayed.
Windows systeminfo command output
It means that Hyper-V and Virtualization is enabled and you are ready for the next steps. If not, please enable virtualization and Hyper-V on your system.
- To check if Virtualization is enabled in Winodws 10, Please follow my post to find out out if virtualization is supported and enabled in Windows 10, Windows 8, Windows Vista or Windows 7 machine.
- To enable Virtualization in Windows 10, please follow my post here.
- Please follow my post on Enabling Hyper-V on Windows 10.
Kubernetes can be installed as a single-node Kubernetes cluster in a virtual machine using Minikube on your personal computer using the following Hybervisiors. On windows, Kubernetes can be installed on
- Hyper-V
- VirtualBox
In this blog, we will setup a Kubernetes Cluster using Minikube in Hyper-V.
Setup Virtual Switch in Hyper-V
Before you setting up Kubernetes using Minikube, we will have to create network connection switch first. Please follow the steps below
- Open Hyper-V Manager
- Click Virtual Switch Manager under action on the right pane in Hyper-V Manger screen
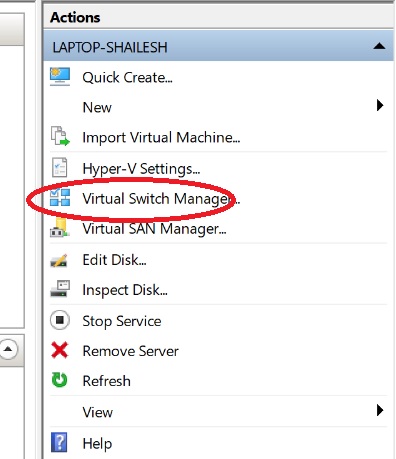
Hyper V- Virtual Switch Manager
- Select External and click on create virtual switch.
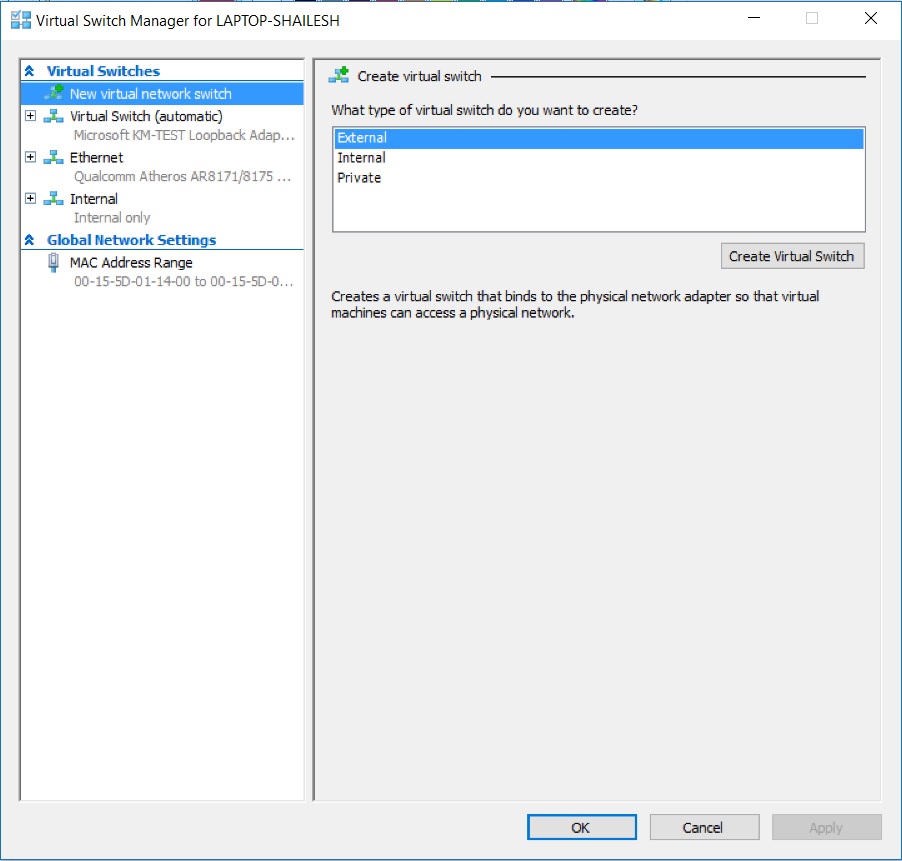
Hyper V Manager – Create New Virtual switch
- In the Virtual Switch properties dialog box, specify the name of your choice of the virtual switch. I have used the name ExternalWiFi and under Connection Type -> External Network, select your system Ethernet card, or WiFi card.
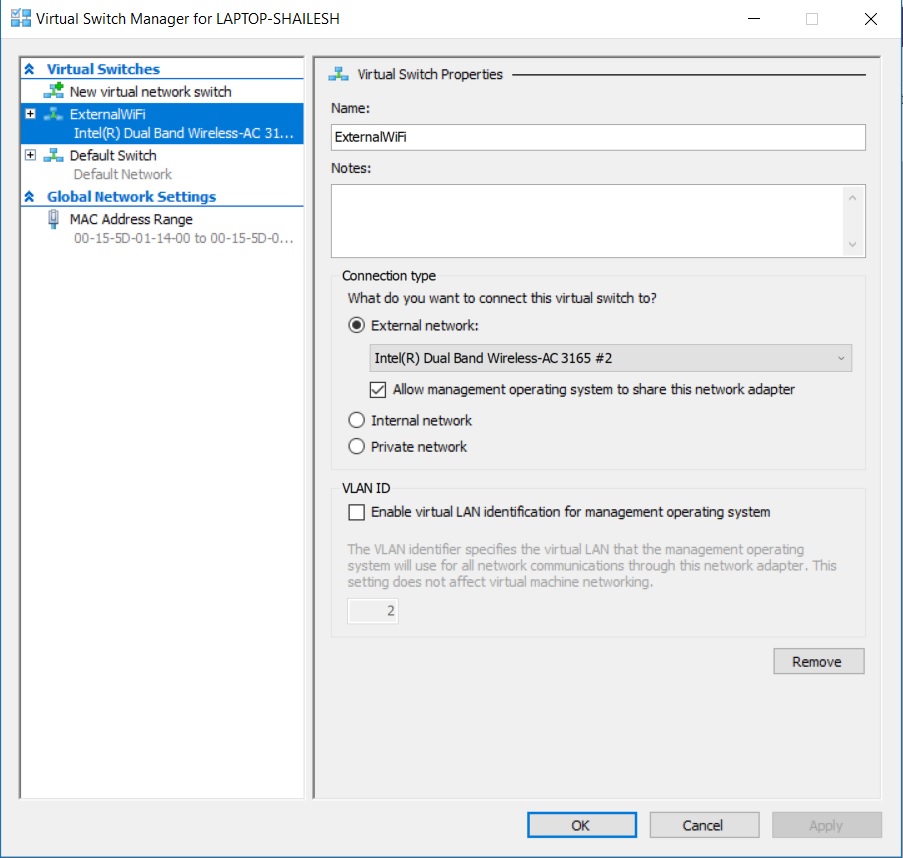
Hyper-V – Virtual Switch Manager
Once you have Hyper V setup successfully, Please follow the below set up Kubernetes using Minikube.
Download Minikube and kubectl
You can install single-node Kubernetes cluster in a virtual machine on your personal computer using minikube. To download Minikube, go to the official Minikube Github page.
Download the 64 bit version of the file. The file name would be something like minikube-windows-amd64.exe
I use the 64 bit version. There is also a 32 bit version of the minikube installer with the file name something like minikube-installer.exe. I have not worked with 32 bit version and would recommend using 64 bit version of Minikube. Scroll to the middle of the web page and you should see the download options.
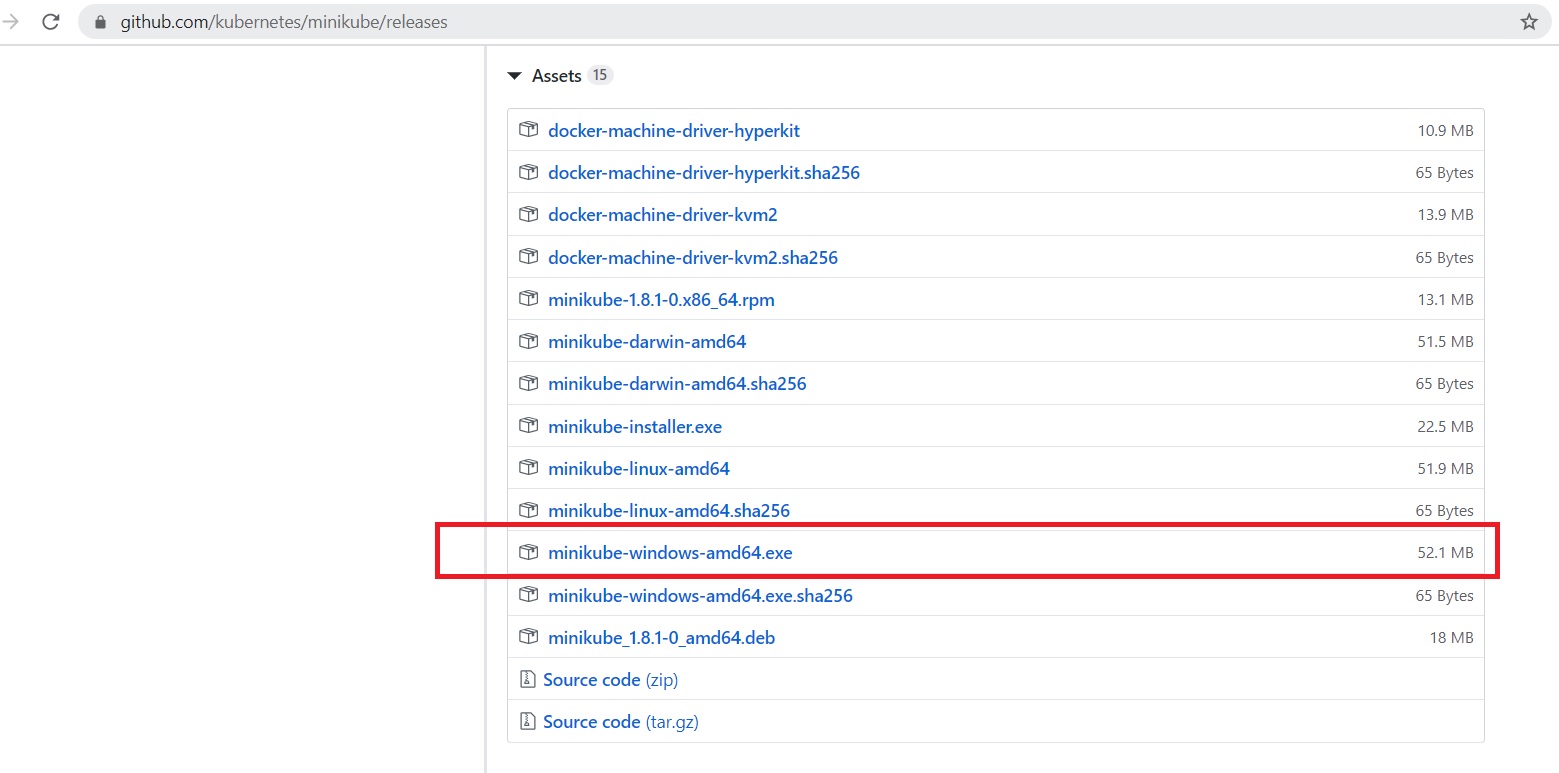
Minikube GitHub Official Page
Similarly download kubectl from the official page under Install kubectl on Windows section.
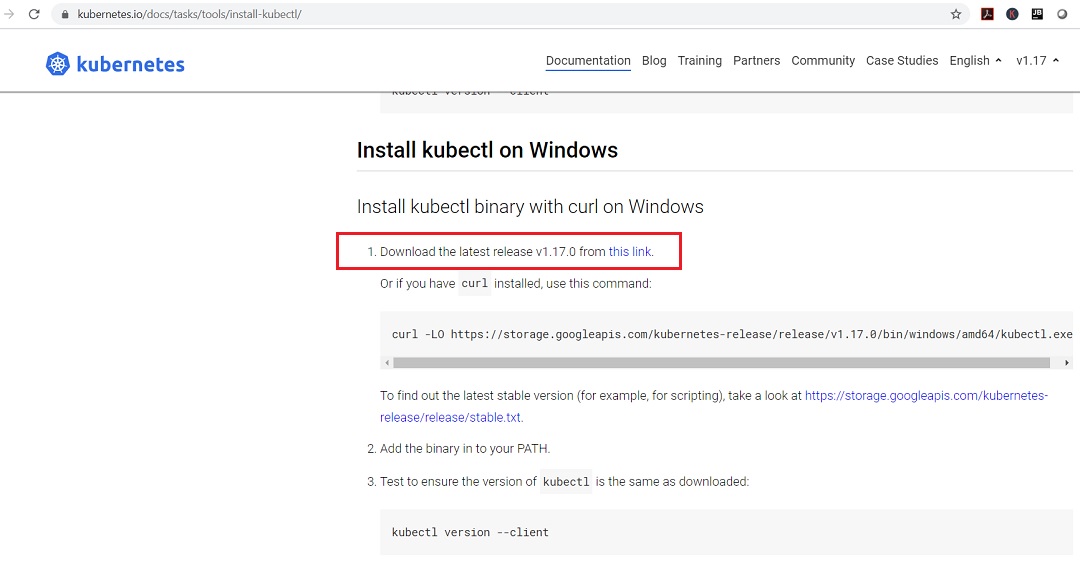
Kubernetes – Install kubectl official page
Setup Minikube and kubectl
There is no installation for Minikube and kubectl. The downloaded file is an executable that you can run directly from command line. I normally rename the file to minikube.exe to make it simple to run minikube from the command line.
I suggest you should also rename the file to minikube.exe and copy both the files minikube.exe and kubectl.exe to C drive -> minikube directory such as C:/minikube.
To check the version of minikube, go to the folder where you have copied the file and open the powershell or command prompt and run
minikube.exe version
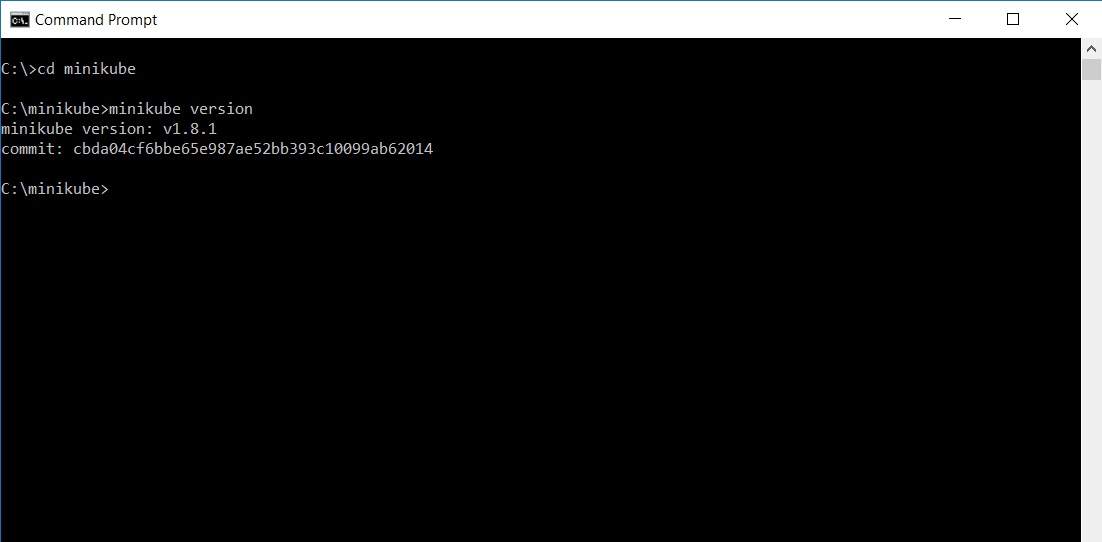
minikube version check – command prompt
Similarly, to check the version of kubectl, go to the folder where you have copied the file and open the powershell or command prompt and run
.\kubectl.exe version
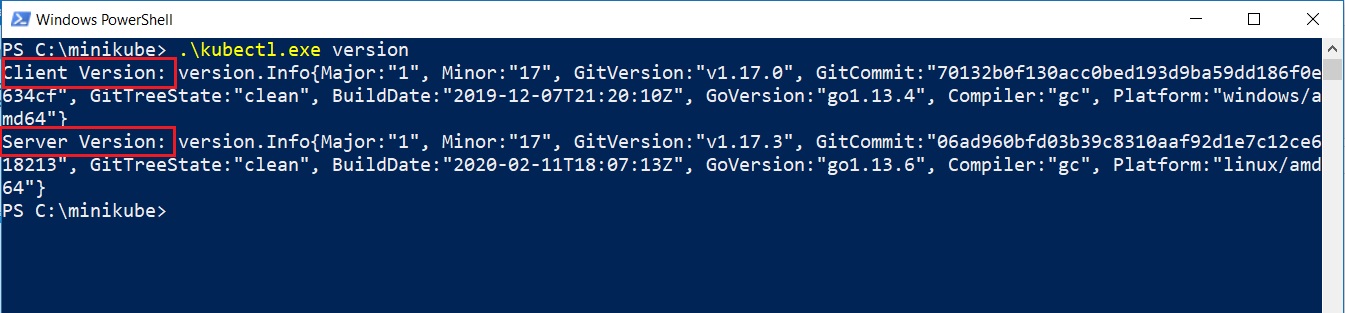
Powershell – Kubectl version check
Add minikube folder to path (optional – you need admin access)
Alternatively, if you want to run the minikube command from anywhere, its better to add it the path variable. This is how you would do it.
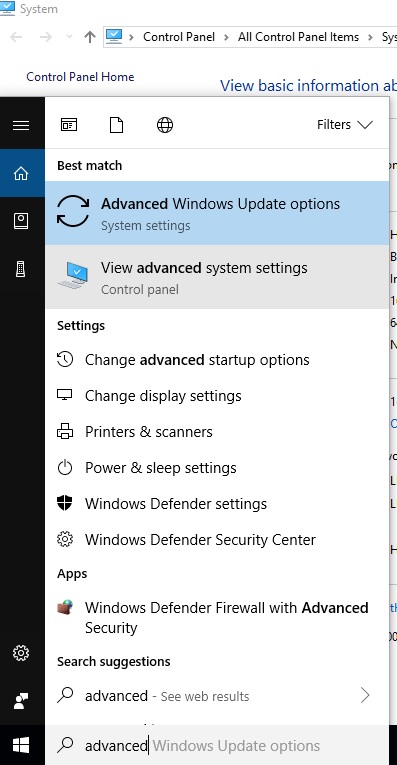
Go to advanced setting
Search advanced setting in the taskbar search pane. Click on view advanced system settings.
Windows 10 taskbar search – advanced settings
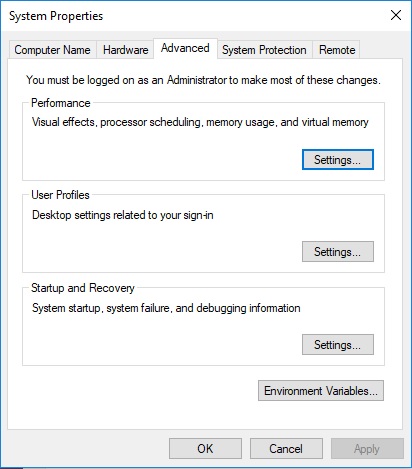
You will see System properties window. Click on Environment variable.
Windows OS – System properties window
Add to path variable
Under System variable – click on path and click edit
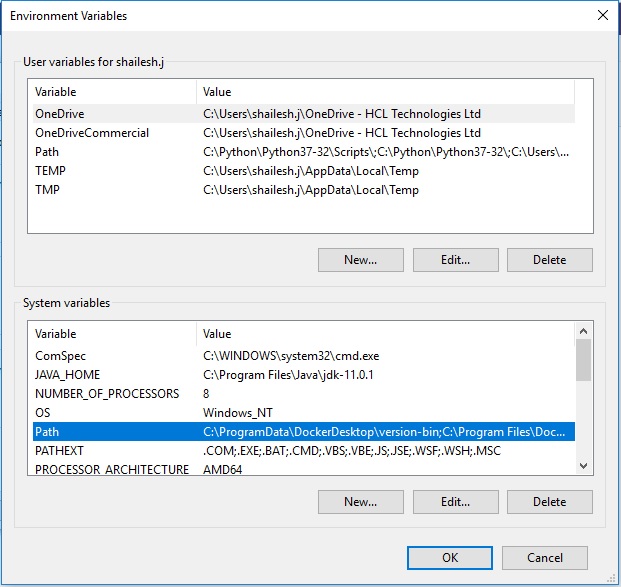
Windows 10 – Environment variable
Click on New, and add the minikube directory path such as c:/minikube. This will change based on where you have extracted the file.
Click on ok continue and exit.
Now you can run minikube command from anywhere in command prompt and powershell.
Let us setup Kubernetes in the next steps
Setup Kubernetes cluster using minikube
Open Powershell or command prompt as an administrator and run the following command:
.\minikube.exe start --driver=hyperv --hyperv-virtual-switch=ExternalWiFi
Note: In the above command, External switch is the name of the virtual switch we created in Hyper-V as described in the sections above. Change this to the name of the virtual switch you have created
With for the process to complete.
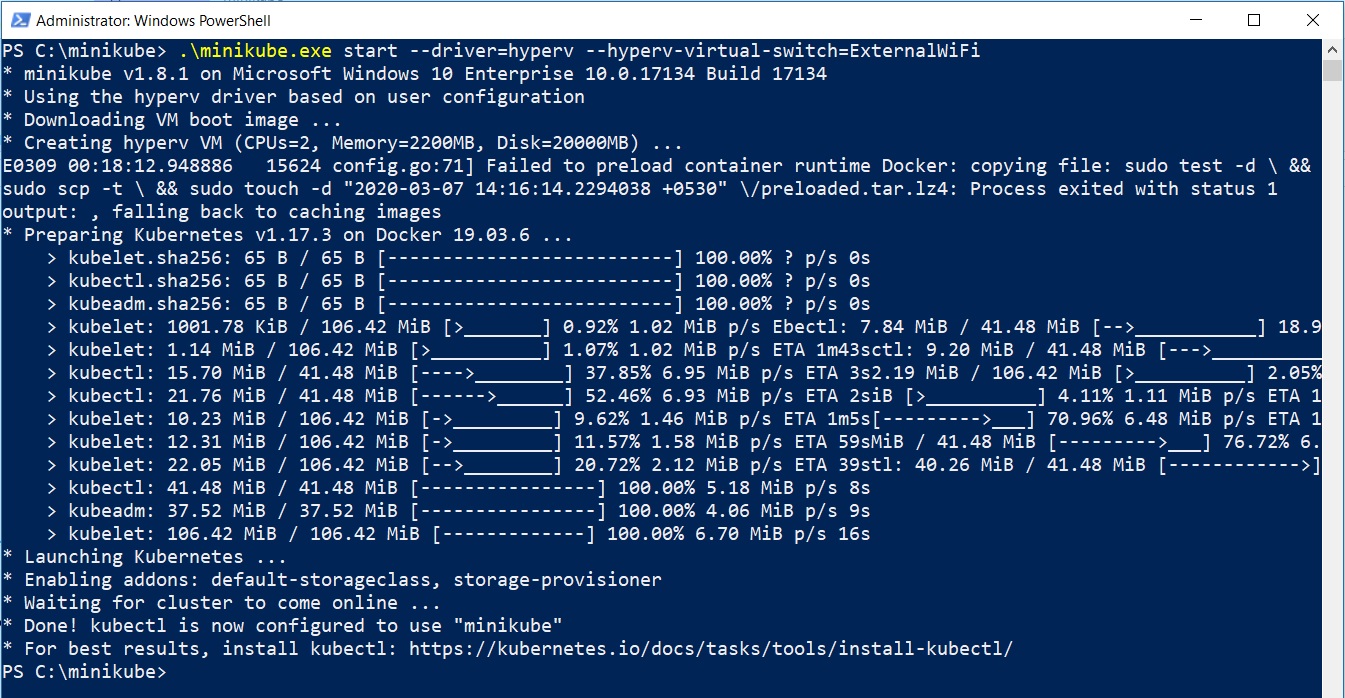
Powershell – Minikube start
Once you see the message * Done! kubectl is now configured to use “minikube”, it means that setup was successfull.
You can check the status of Minikube by running the command
.\minikube.exe status in powershell.
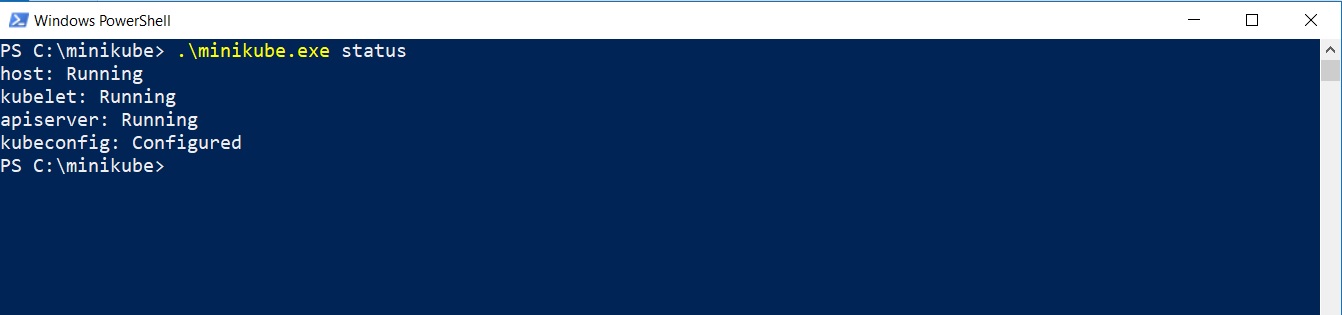
Powershell – Minikube Status
If you open Hyper-V manager, you can see Minikube VM running.
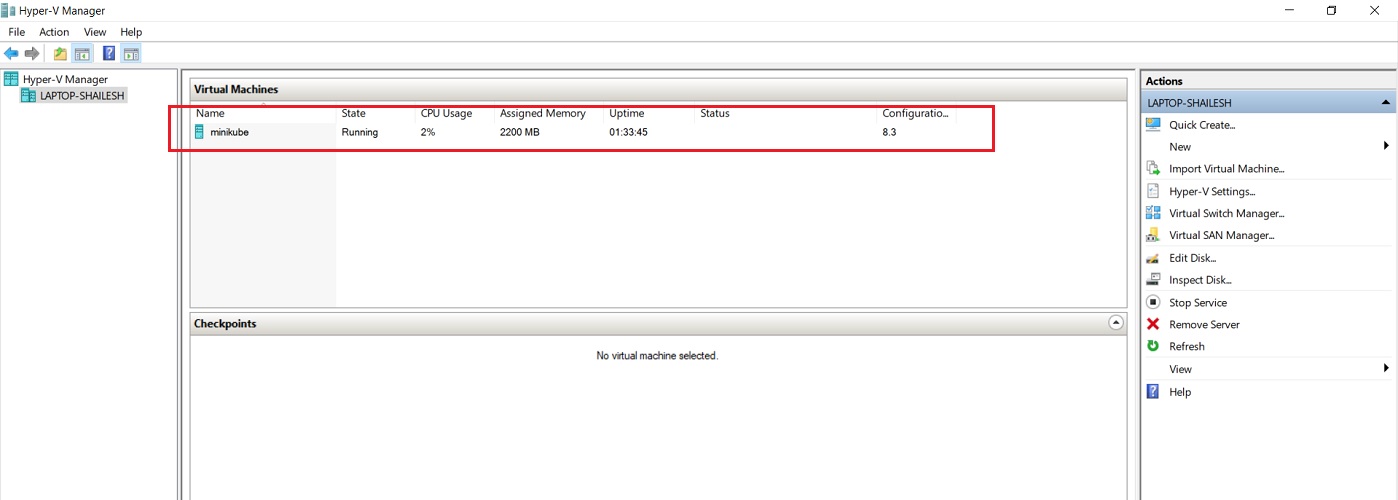
Hyper-V – Minikube VM running
Step 3 – Enable Kubernetes dashboard
Kubernetes dashboard provides you with the web based interface where you can
- Overview of the cluster
- Deploy application to the cluster
- Troubleshoot running applications
- Manage resources
- Get information about the state of the running resources
- Get resource matrix
Kubernetes dashboard is not deployed or available by default. You will have to deploy it by running the following command.
kubectl apply -f https://raw.githubusercontent.com/kubernetes/dashboard/v2.0.0-beta8/aio/deploy/recommended.yaml
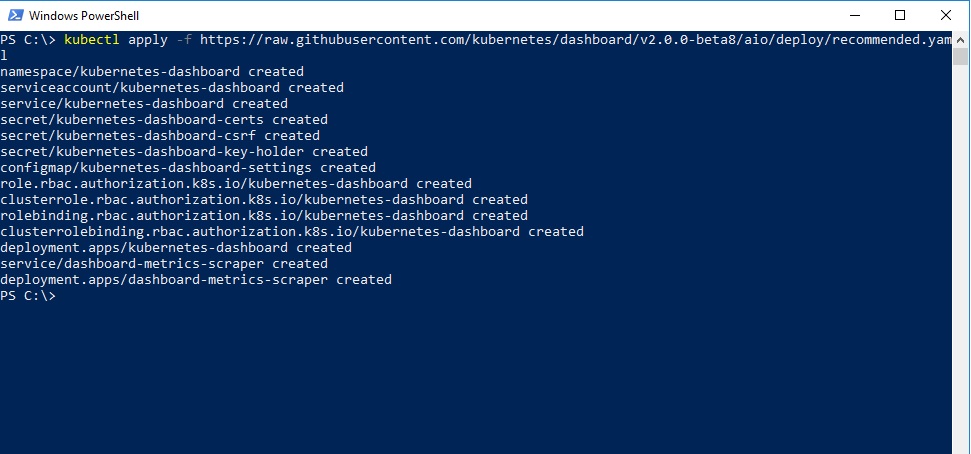
Deploy Kubernetes dashboard
To access the dashboard run the command:
kubectl proxy
This is the output you will get:
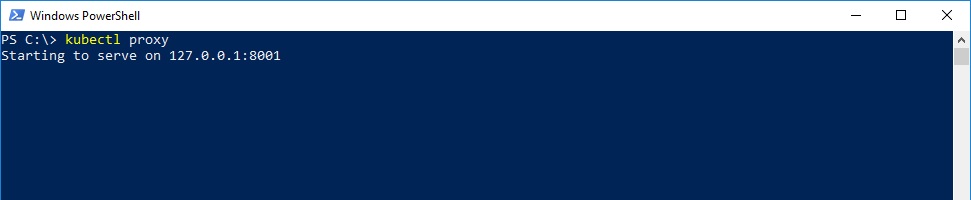
Run kubernetes proxy command
Now access the URL of the dashboard at:
http://localhost:8001/api/v1/namespaces/kubernetes-dashboard/services/https:kubernetes-dashboard:/proxy/
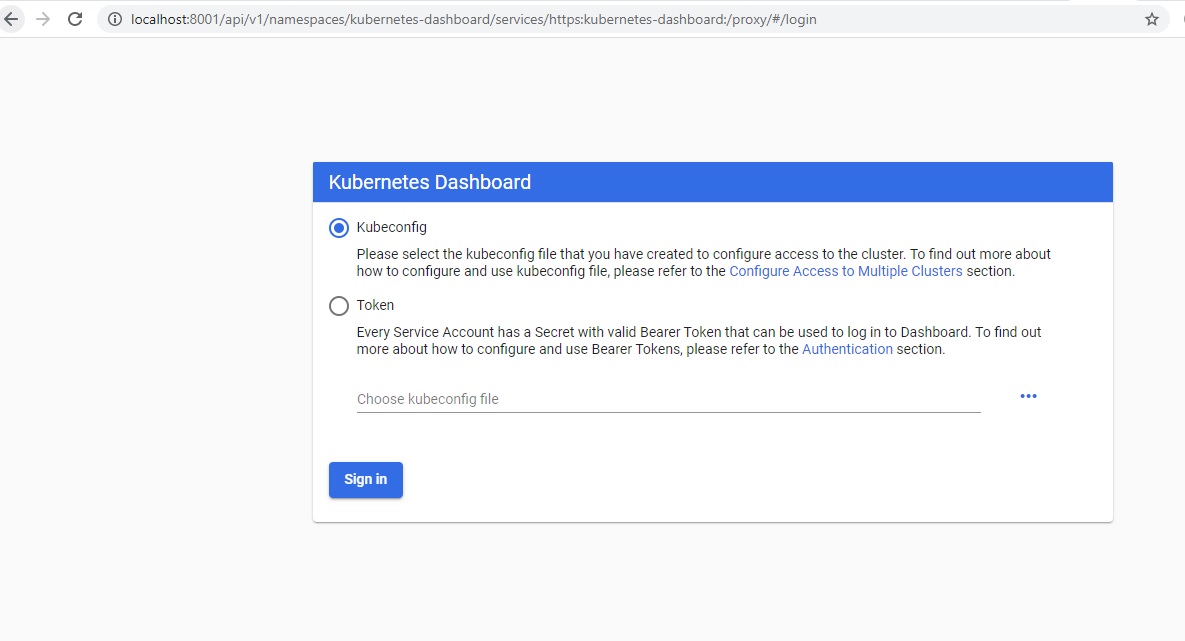
Kubernetes dashboard
But before you access the dashboard, you will have to create a service account for admin user and create cluster role binding.
Create Service account for admin-user
Create a file and name it as dashboard-adminuser.yaml and copy and paste the below code and save it at a convenient location. I stored it in desktop.
apiVersion: v1
kind: ServiceAccount
metadata:
  name: admin-user
  namespace: kubernetes-dashboard
Go to desktop or the folder in which you have stored the file in powershell or command prompt and run the following command:
.\kubectl apply -f .\dashboard-adminuser.yaml
This is the output you will get.

kubectl – create service account and admin user using powershell
Create Cluster Role Binding
Now we will have to create Cluster Role Binding. Copy the below line of code and save it in a file dashboard-adminuser_cluster_role_binding.yaml
apiVersion: rbac.authorization.k8s.io/v1
kind: ClusterRoleBinding
metadata:
  name: admin-user
roleRef:
  apiGroup: rbac.authorization.k8s.io
  kind: ClusterRole
  name: cluster-admin
subjects:
- kind: ServiceAccount
  name: admin-user
  namespace: kubernetes-dashboard
Go to desktop or the folder in which you have stored the file in powershell or command prompt and run the following command:
.\kubectl.exe apply -f .\dashboard-adminuser_cluster_role_binding.yaml
Below is the output of running the above command. Since I had already created it, you will see unchanged in the output. In your case, you will see created instead of unchanged.
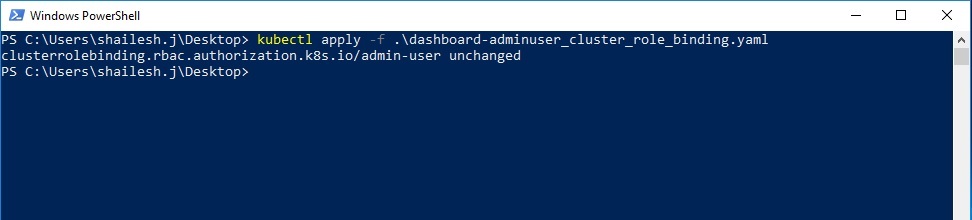
kubectl – create cluster role binding for admin user
Find Bearer Token to Login
Now we will have to find the bearer token to log in. Run the following command from Powershell:
.\kubectl.exe -n kubernetes-dashboard describe secret $(.\kubectl.exe -n kubernetes-dashboard get secret | sls admin-user | ForEach-Object { $_ -Split '\s+' } | Select -First 1)
Copy the token from the output. We will use this to login.
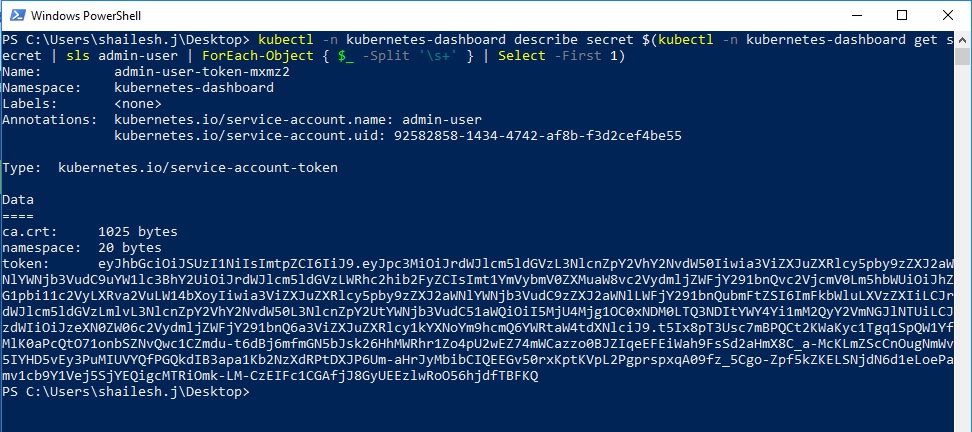
kubectl – find bearer token using powershell
Login using Bearer Token
Select Token in the Kubernetes UI dashboard and paste the token and click signin.
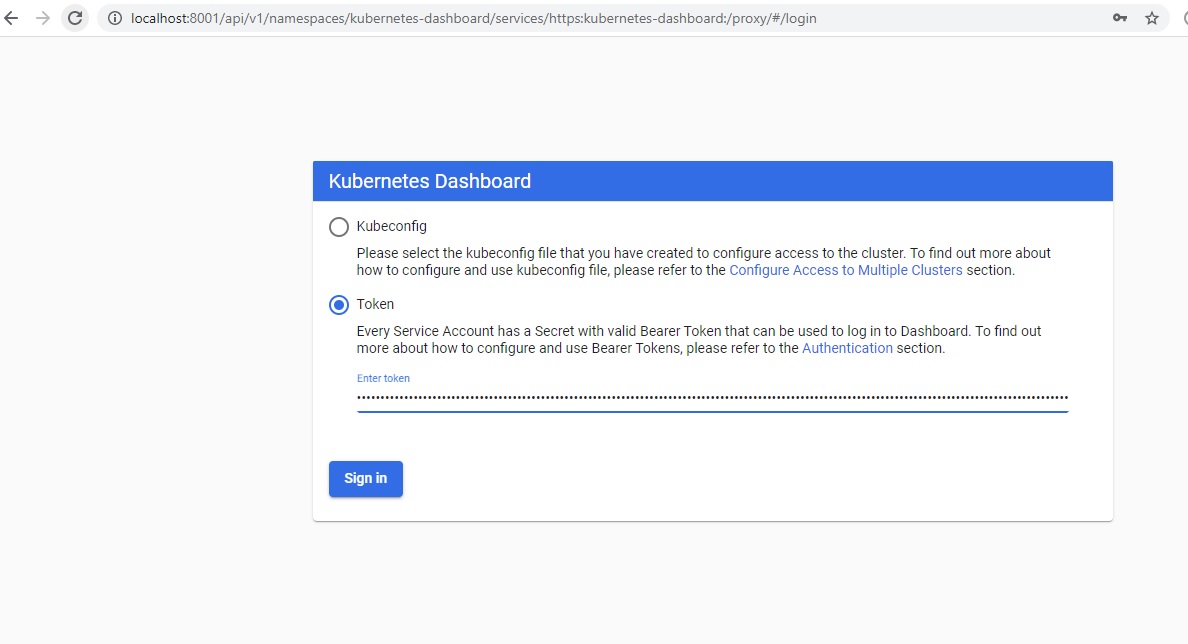
Kubernetes dashboard – Sign in with token
Once you Sign in, you will see the dashboard.
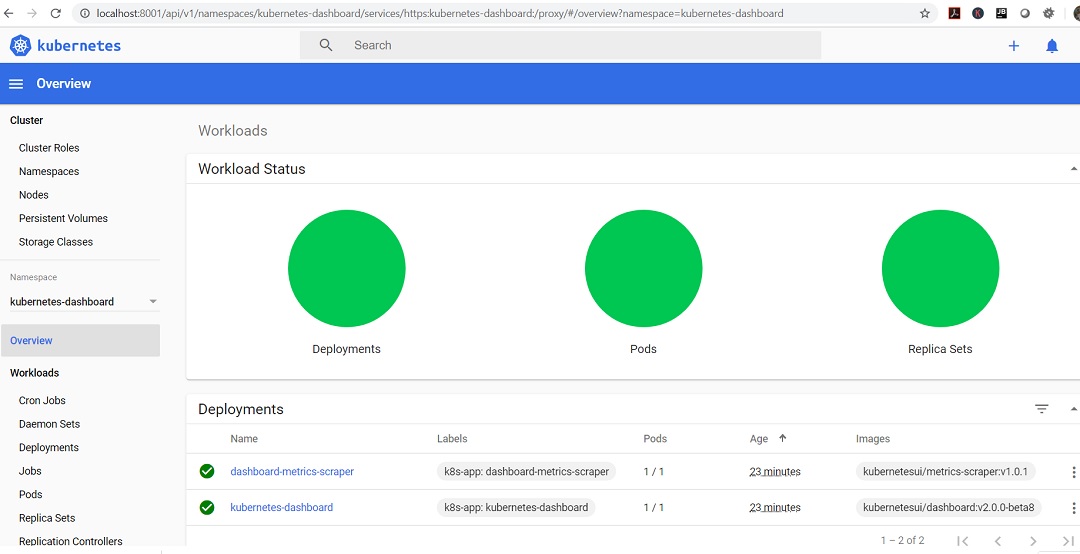
Kubernetes dashboard UI screen
Stop Minikube
To stop Minikube or shutdown the Kubernetes cluster, run the following command in Powershell.
.\minikube.exe stop

Powershell – minikube stop
Restart Minikube
To restart minikube, use the same command we used earlier in powershell as an administrator which is
.\minikube.exe start --driver=hyperv --hyperv-virtual-switch=ExternalWiFi
Using the same command does not re-install Minishift. Instead, it restarts the existing Minikube VM as shown in the below screenshot.
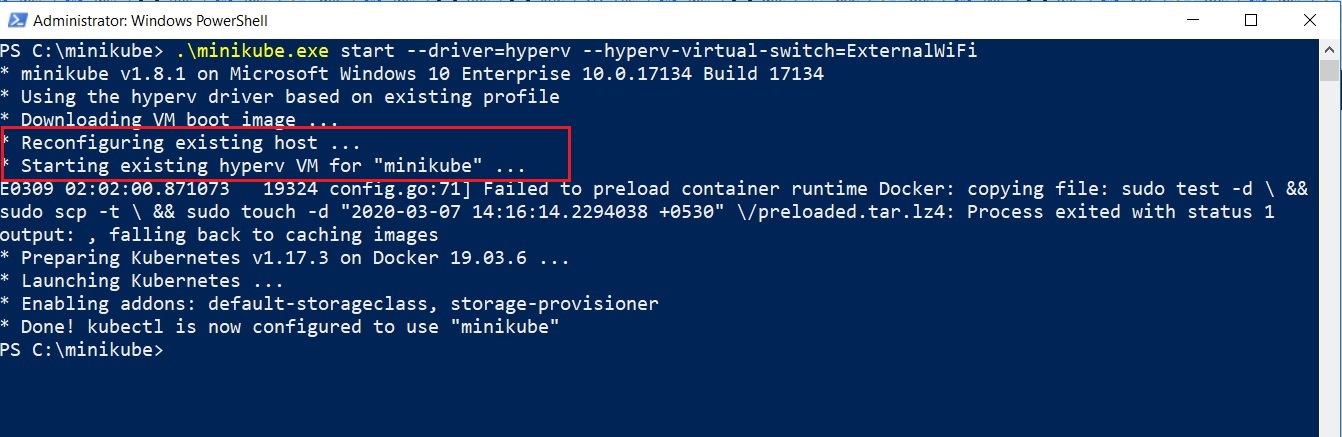
Powershell – minikube restart
That’s it, thanks for visiting my Blog.