In this blog post, I will show you how to setup and install Kali Linux 2022.1 in VMware Workstation Player 16 which is the latest version of VMware Player.
You can also watch my YouTube video on this topic. Rest of the blog is the detailed step.
About VMware Workstation Player
VMware Workstation Player is the limited capability free version of VMware Workstation Pro. That is, it is just as VMware Workstation Pro with lesser functionality. But what is available is enough for most of the home users.
VMware Workstation player is available free of cost. Earlier it was not free, but I see that VMware has made it available for free for non Commercial users. For commercial usage, VMware Workstation Pro is more suitable where you will be able to run and manage multiple VM’s at the same time.
This is the download page for all the VMware products. You will have to scroll down to VMware Player option to see the download link. From here you download any VMware Products. This link will always remain valid even when newer versions of the products are released. This is the direct link to download VMware Workstation Player 16.
- You can also install Kali Linux 2022.2 in VirtualBox 6, please follow my blog to here
- To Install Kali Linux using Kali Linux official Image, please follow my post here
- To Install Kali Linux 2022.2 in VMware Workstation pro 16, Please follow my post here
- To Install Kali Linux 2022.2 in Hyper-V, Please follow my post here
- If you want to install previous version of Kali Linux which is 2020 in VMware Workstation 16 Pro, please follow my post on here
Lets gets started with Installing Kali Linux 2022 in VMware Player 16
Step 1 – Download Kali Linux ISO image
To install the Kali Linux, we will have to first get the installer ISO image file. You can get it by visiting the official download page. Scroll down to the Live Boot section and click on it.
Kali Linux official download page
Step 2 – Locate the downloaded file
You can find the downloaded image file in the downloads folder, if you have not changed the default settings. The filename would be something like kali-linux-2021.1-installer-amd64.iso and would be around 4.0 GB. If you have downloaded through torrent, the ISO file will be downloaded in a folder, folder name would be something like kali-linux-2021.1-installer-amd64.iso.
Step 3- Open VMWare Player
Open VMware Player from Windows Start menu or from you desktop if you have VMware Player icon there.
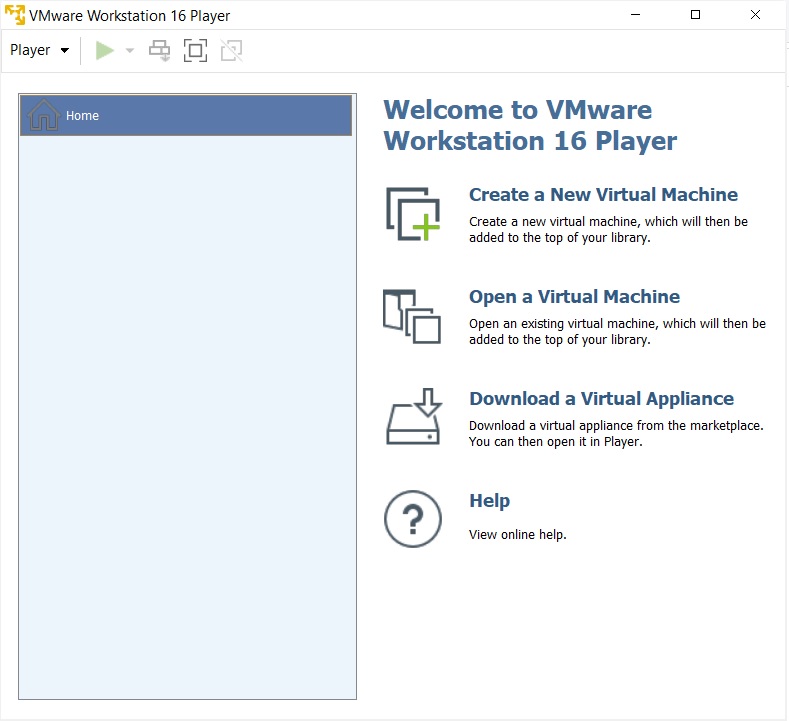
VMware Player 16 home screen
Step 4 – Launch VMware Player – New Virtual Machine installation wizard.
To launch the wizard to create a new virtual machine, Click on Create a New Virtual Machine or File -> New Virtual Machine. Welcome to the new Virtual Machine Wizard dialog box will open. Select typical and click on next.
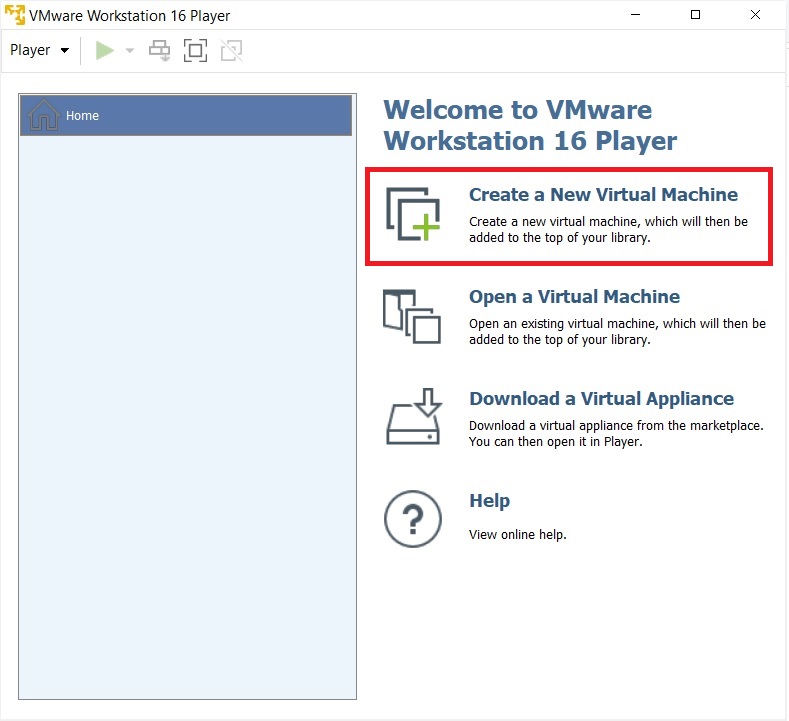
VMware Player 16 – Create new virtual machine
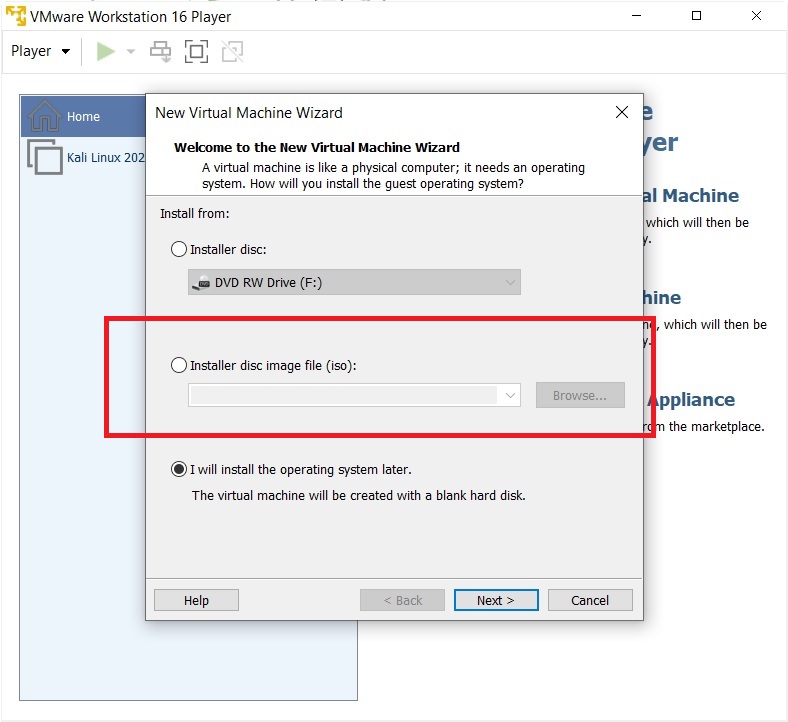
Step 5- Welcome to the new Virtual Machine Wizard dialog box appears
You will see new Virtual machine Wizard dialog box. Click Next.
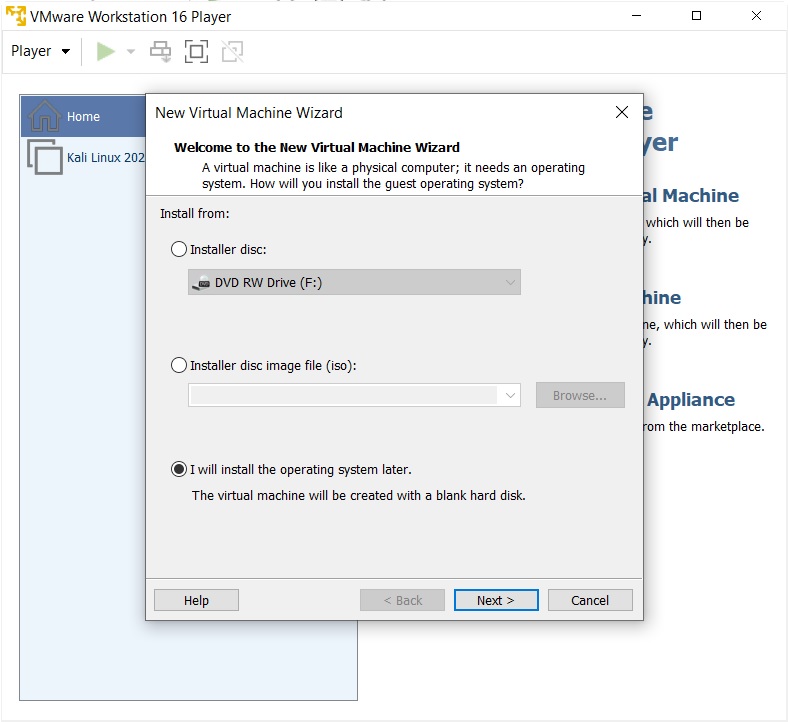
VMware Player 16 – Welcome to the new Virtual machine Wizard
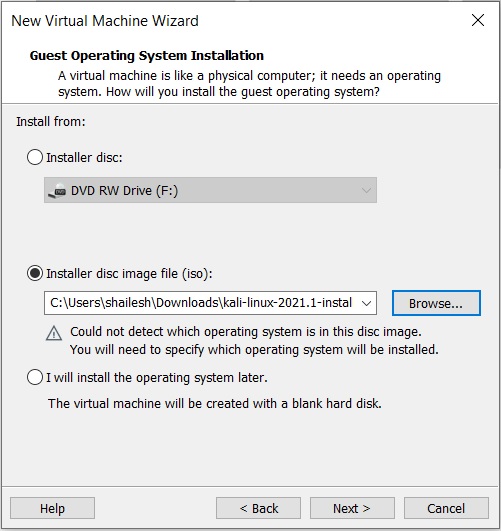
Step 6- Select installation media or source
In this dialog box you will have to browse to the downloaded ISO file and click next. Generally, VMware Workstation detects the OS automatically and initiates what they call as the Easy Install. But in the case of Kali Linux this is not the case and you will see a warning(yellow triangle). Please ignore that and click next to continue.
VMware Player 16 – Welcome to the new Virtual machine Wizard
VMware Workstation Player 16 – Select Guest Operating System
Step 7- Select Guest Operating System
In this dialog box, you will be asked to select the Guest Operating System. Select Guest operating system as Linux and Version as Debian 10.x 64-bit or 32 bit depending on your system.
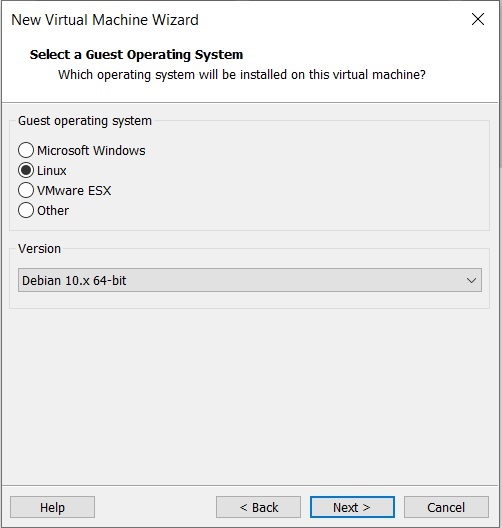
VMware Workstation Player 16 – Select Guest Operating System
Step 8- Provide Virtual machine name
In this dialog box, you will be asked to provide the name of the virtual machine. You can provide any name you like. You can also change the location of the virtual machine. By default it is place in the Documents/Virtual Machine folder. Leaving it as the default is also fine.

Kali Linux Installation – Name of VM
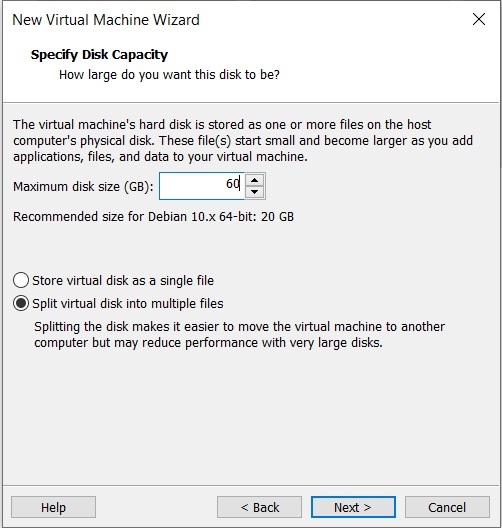
Step 9- Specify disk capacity
This dialog box asks you to specify the disk capacity. This is the maximum amount of disk space it will utilize once the Virtual Machine is created. You can leave it to the default but if you are running low on disk space, you can reduce it to 20 GB. This is generally sufficient if you are not planning to install heavy disk using software’s such as Photoshop. Such software’s reduce the performance of your Virtual Machine if your Computer is not powerful enough.
Check Split Virtual Disk into multiple files. This is the default option. Say if you specify 60 GB, all of 60 GB will not be utilized or say 60 GB will not be blocked at once. These Virtual Disks expand according to the usage with a Maximum size you specifed as the disk capacity. On a fresh install normally it takes 10 GB of space which will grow according to the software’s you install in the VM.
Kali Linux Installation – Specify Disk Space
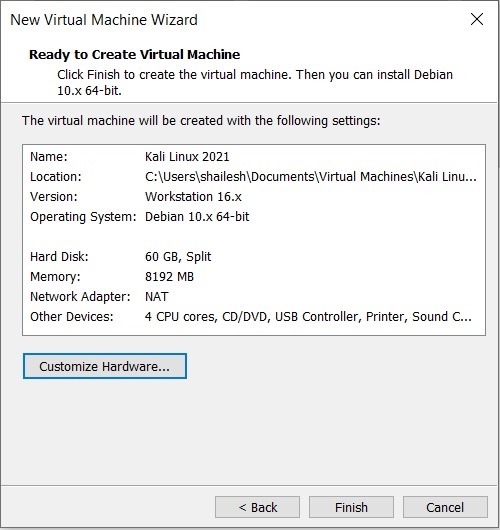
Step 10- Ready to create Virtual Machine Dialog Box
This is the final dialog box and what you see is all the options you have selected in previous dialog boxes.
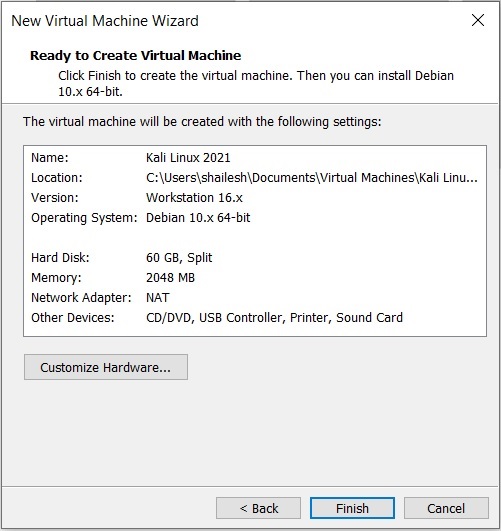
Kali Linux Installation – Ready to create virtual machine
Customise Hardware – Normally I increase the RAM and memory before clicking finish. This helps to finish the installation process faster. If you have sufficient RAM and CPU on your host Windows machine, I suggest even you should increase RAM and CPU. To increase the RAM, before clicking Finish, click on customise hardware. Increase the memory using the slider.
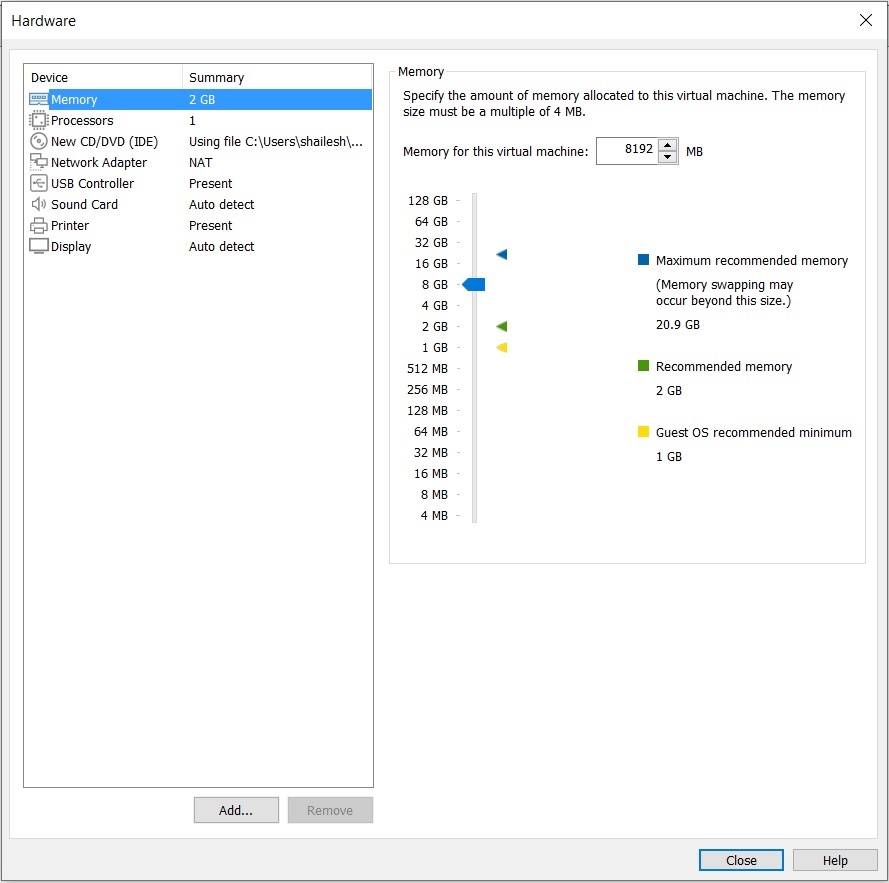
Kali Linux Installation – Customise Hardware – Memory
To increase the CPU, Enter the number of cores. I normally enter 4. Based on your CPU you can enter the number of cores.Click on Finish to start the installation process.
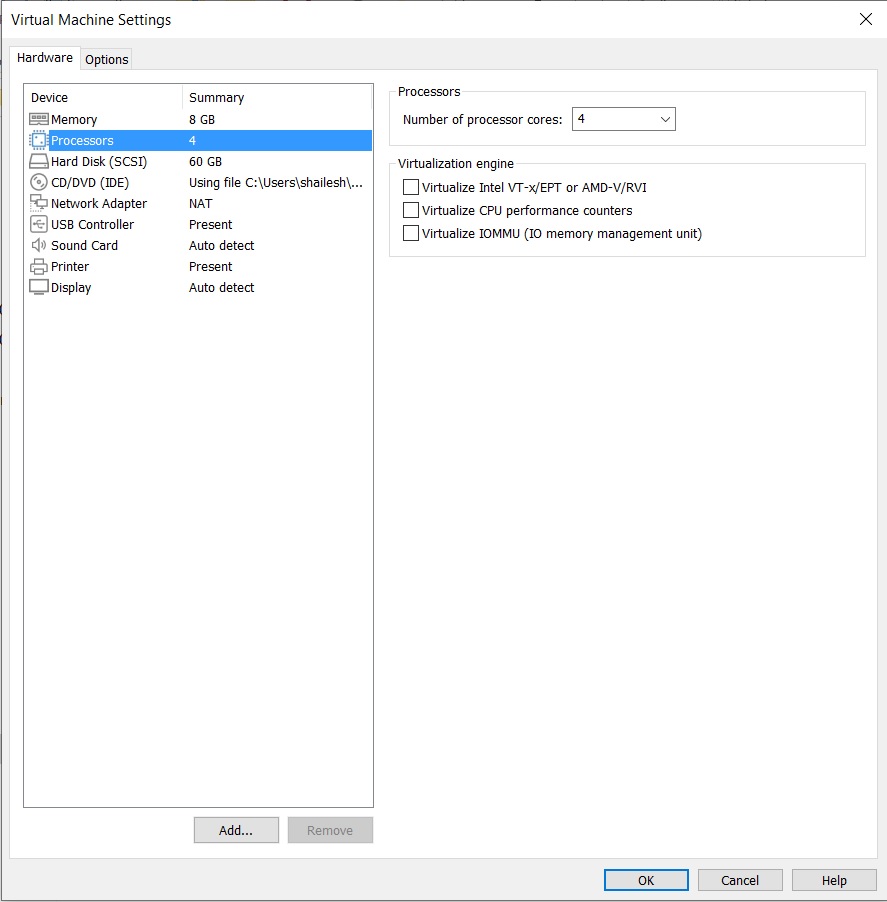
Kali Linux Installation – Customise Hardware – Processor
Click on Display to change the display settings. Check Accelerated 3D Graphics, Use host settings for monitor.
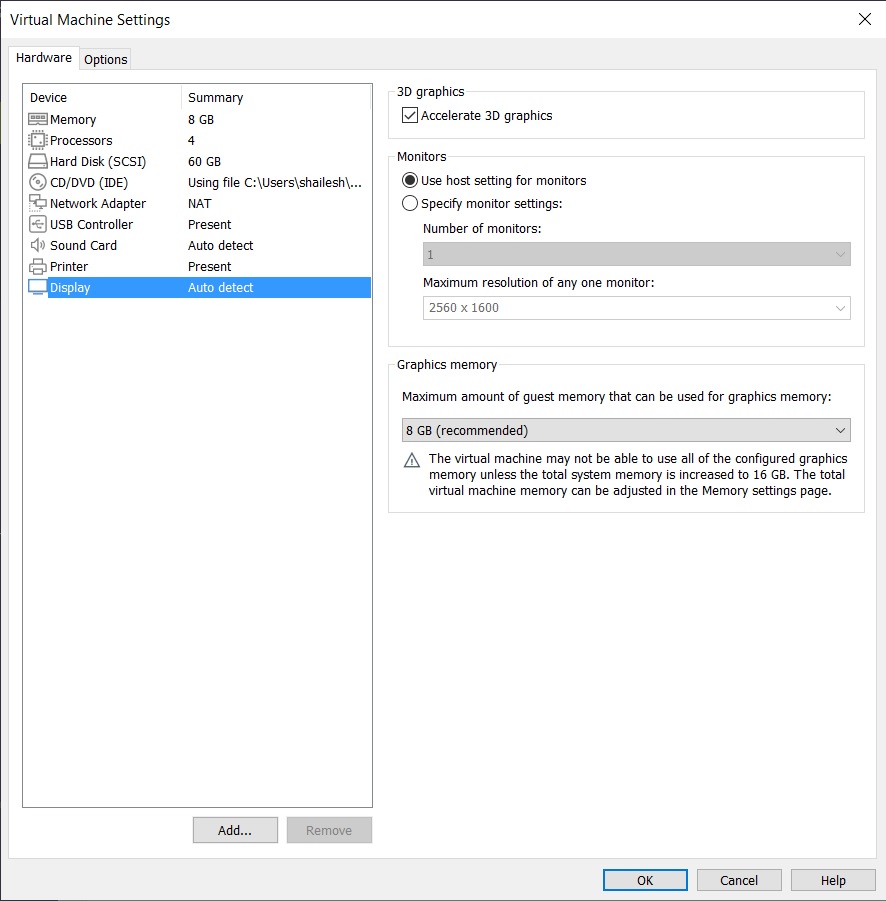
Kali Linux Installation – Customise Hardware – Display
Click on OK and Finish to start the installation process
Kali Linux Installation – Ready to create virtual machine
Step 11 – Play Virtual Machine
Now you will have to click on play virtual machine to start the process.
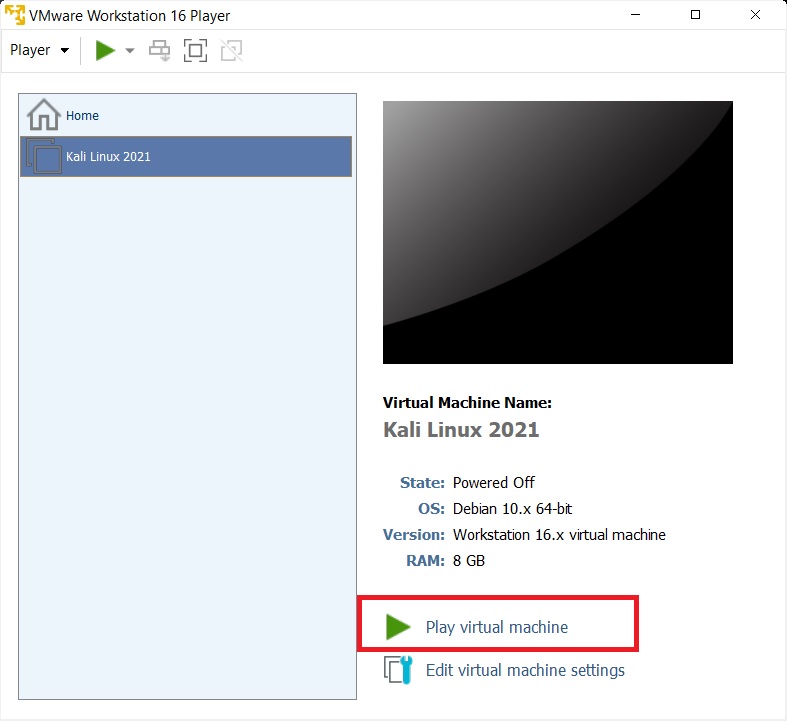
VMware Player 16 – Play Virtual machine
Step 12 – Select Graphical Install from Boot Menu
Here you will see many options. Select Graphical Install using the down arrow key and click continue.
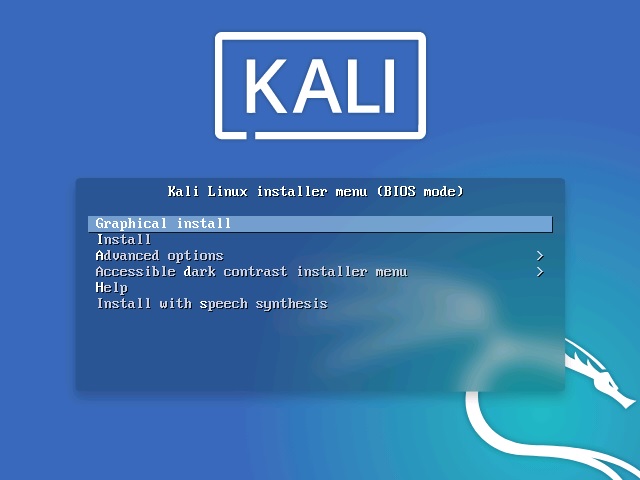
Kali linux installation boot menu screenshot
Step 13 – Select a Language
In this dialog box you will be asked to select a language. Please select a language and continue. This option sets your language in the Kali Linux Operating system. Default is English.
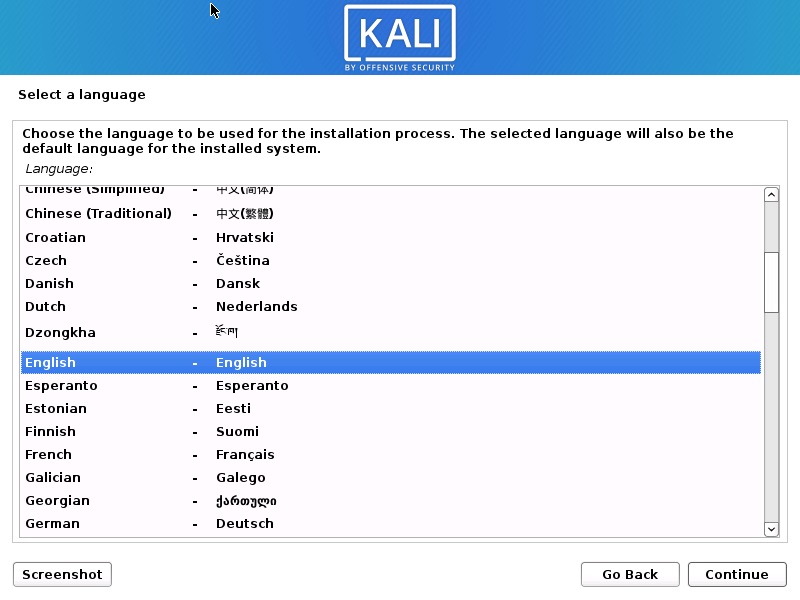
Install Kali Linux 2021 – Select a Language Screenshot
Step 14 – Select Location
In this dialog box you will be asked to select a Location. Please select a location and continue. This option sets your Location in the Kali Linux Operating system. later on, you will be able to set the time zone based on the location you choose here.

Install Kali Linux 2021 – Select Location Screenshot
Step 15 – Configure the Keyboard
In this dialog box you will be asked to select the keyboard layout. Please select a Keyboard layout using the arrow keys and click continue. This option sets your Keyboard in the Kali Linux Operating system. By default it is set to American English.

Install Kali Linux 2021 – Configure keyboard Screenshot
After you click continue, you will see the installation progresses for some them you see the Network Configuration dialog box, which is the next step.

Install Kali Linux 2021 – Installation progress Screenshot
Step 16 – Configure the Network – Enter Hostname
In this dialog box you will be asked to enter the hostname for your system. This being a home network, we can set anything. Enter any anything and click continue.

Install Kali Linux 2021 – Configure the Network Screenshot
Step 17 – Configure the Network – Enter domain name
In this dialog box you will be asked to enter the domain name for your system. This being a home network, we can set anything like example.com
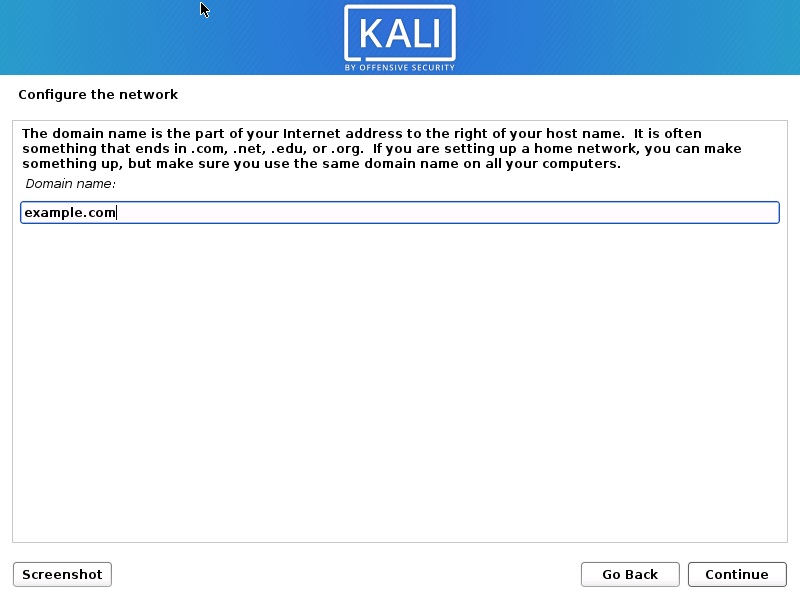
Install Kali Linux 2021 – Configure the Network- Enter Domain Name Screenshot
Step 18 – Set User account and password
In this dialog box you will be asked create an account other than the root user. Please note that this is the user other than the root user. Please type your name and click continue
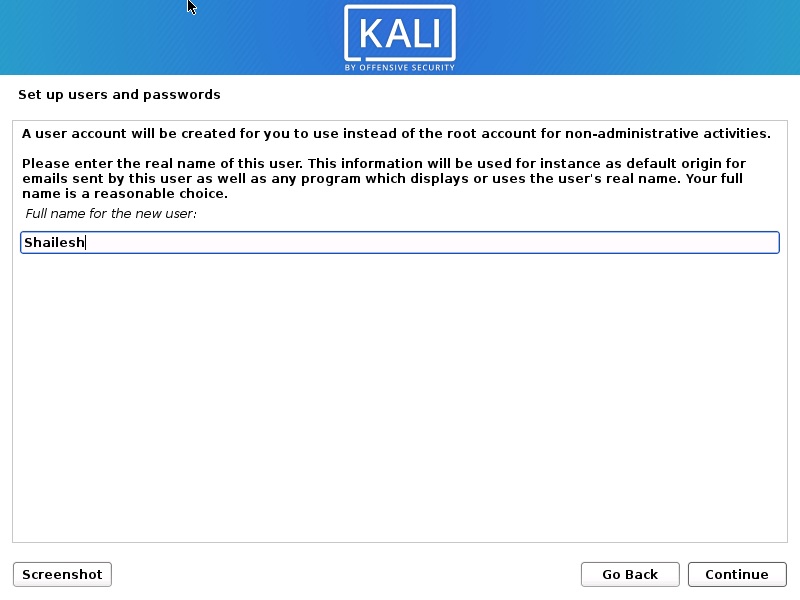
Install Kali Linux 2021 – Set up Users account Screenshot
Now you will be asked to provide the user name again. I use the same name as the account name in the previous screen.
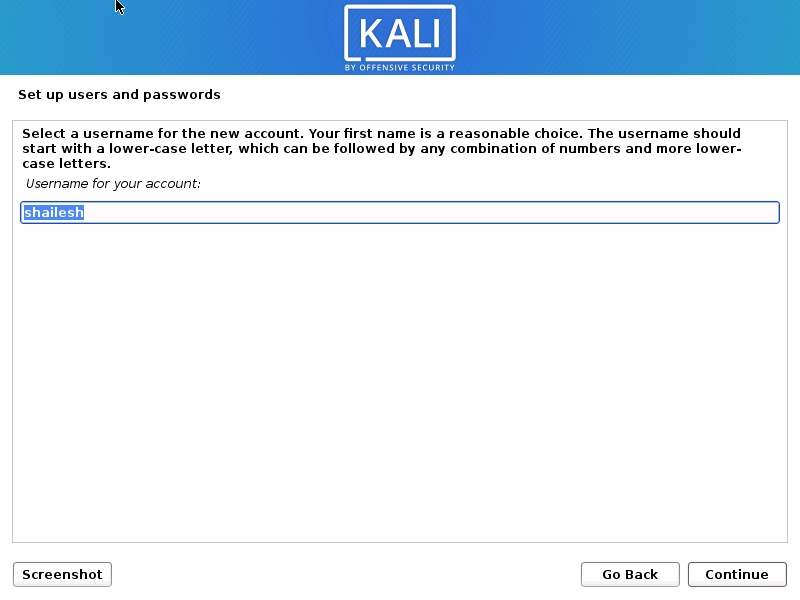
Install Kali Linux 2021 – Set up Users name Screenshot
You will be asked to setup a password of the user you created. Enter the password. We will login with this username and password once the installation completes.
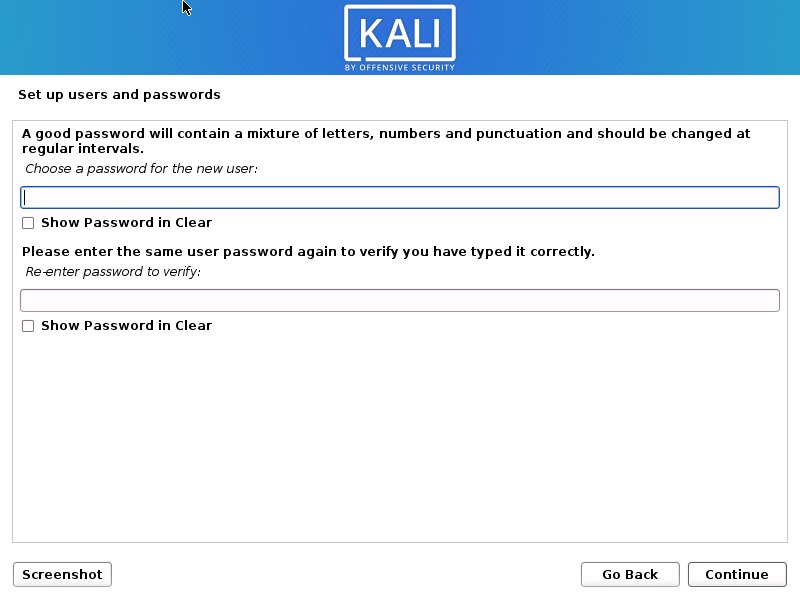
Kali Linux Installation – set user password
Step 19 – Partition Disk
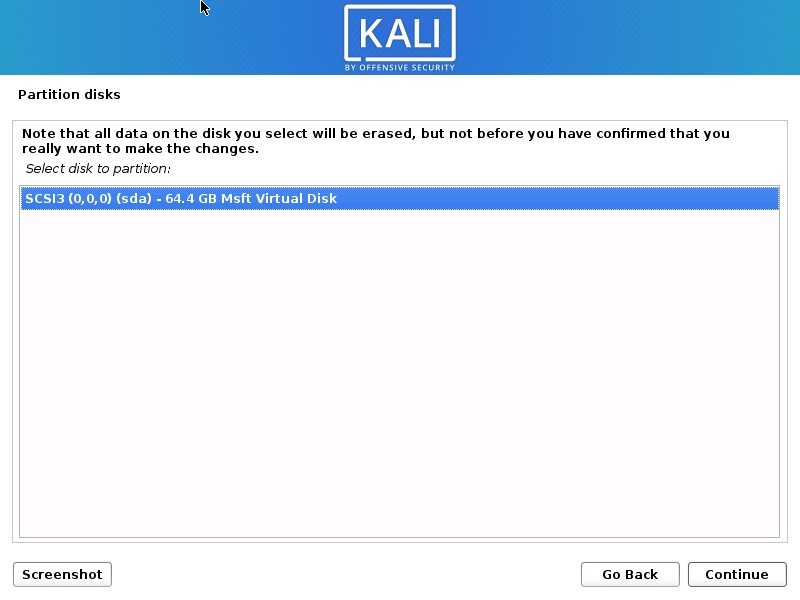
In this dialog box you are asked how you would like to partition your disk. Select Guided – Use entire disk and click continue. This is the default option.
Install Kali Linux 2021 – Select Disk to Partition Screenshot
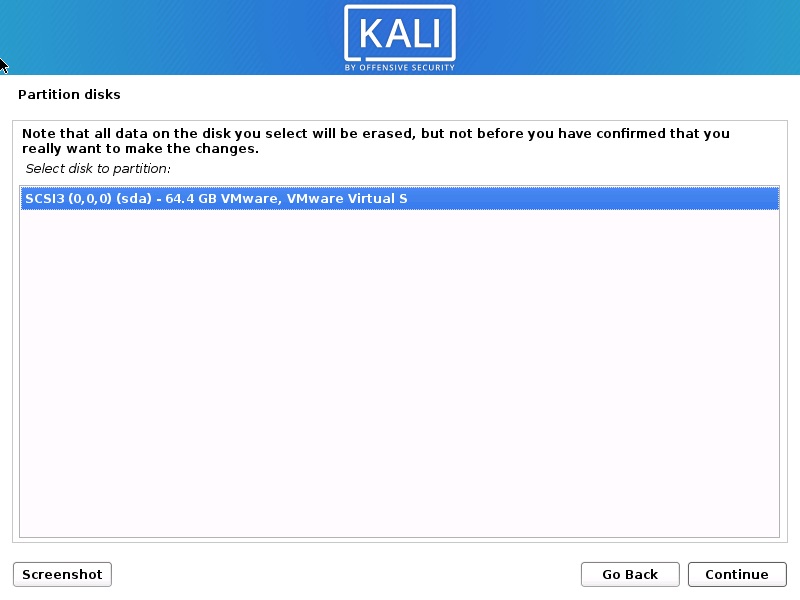
In this dialog box you are asked to select a disk to partition. Select sda, VMware Virtual disk. There should be only one option. Click Continue.
Install Kali Linux 2021 – Select Disk to Partition Screenshot
Step 20 – Select partition scheme
In this dialog box you are asked to select a scheme for disk partition. Select the default, All files in one partition and click Continue.
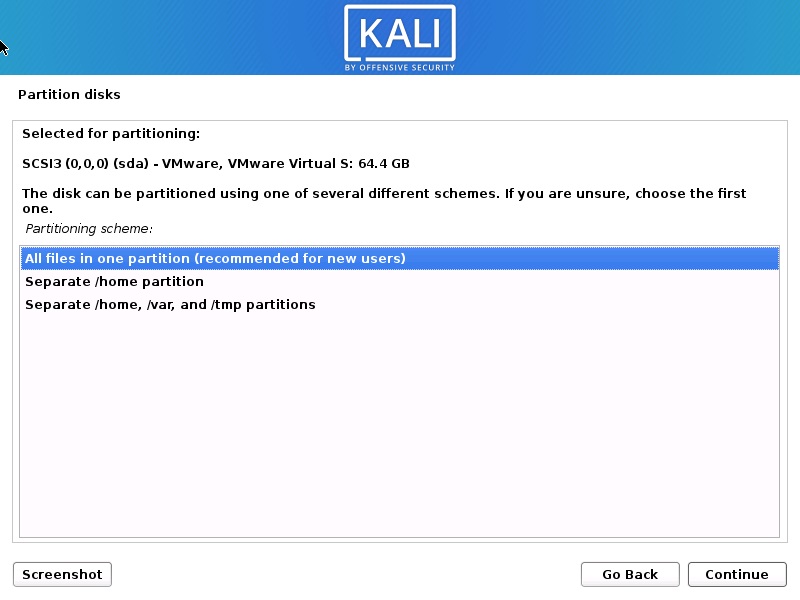
Install Kali Linux 2021 – Disk Partitioning Scheme Screenshot
Step 21 – Disk partition Overview
In this dialog box you are see the summary of your disk partition. Select the Finish Partitioning and Write changes to disk which should be selected by default. All you have to do is to click continue.
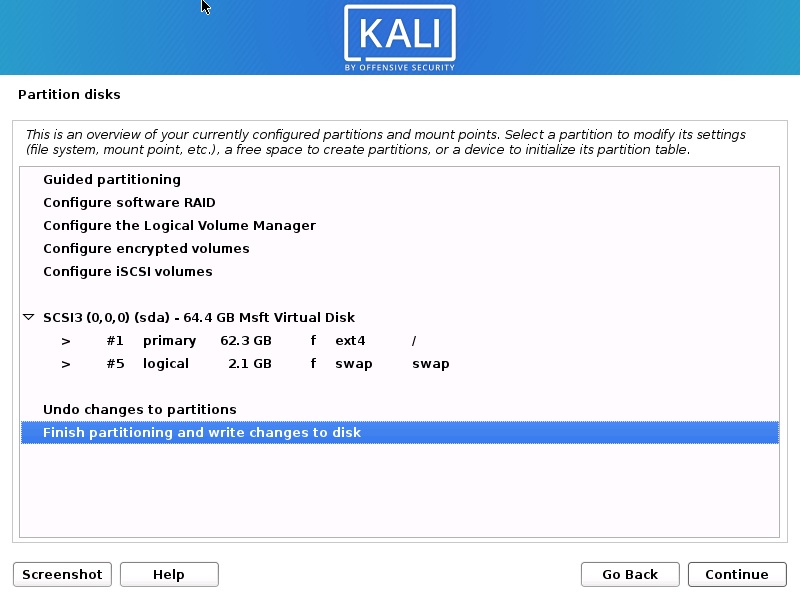
Install Kali Linux 2021 – Disk Partition Overview Screenshot
Step 22 – Disk partition Confirmation
In this dialog you are asked to confirm Write changes to disk. Select yes and click continue.
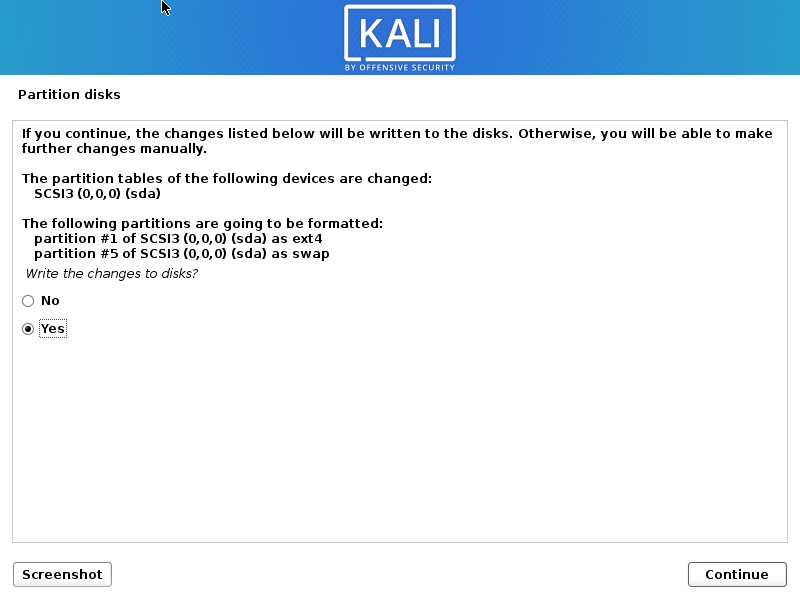
Install Kali Linux 2021 – Disk Partition Confirmation Screenshot
Step 23 – Installation starts
Now the actual installation starts. Wait for Configure the Package Manager Dialog box to appear.
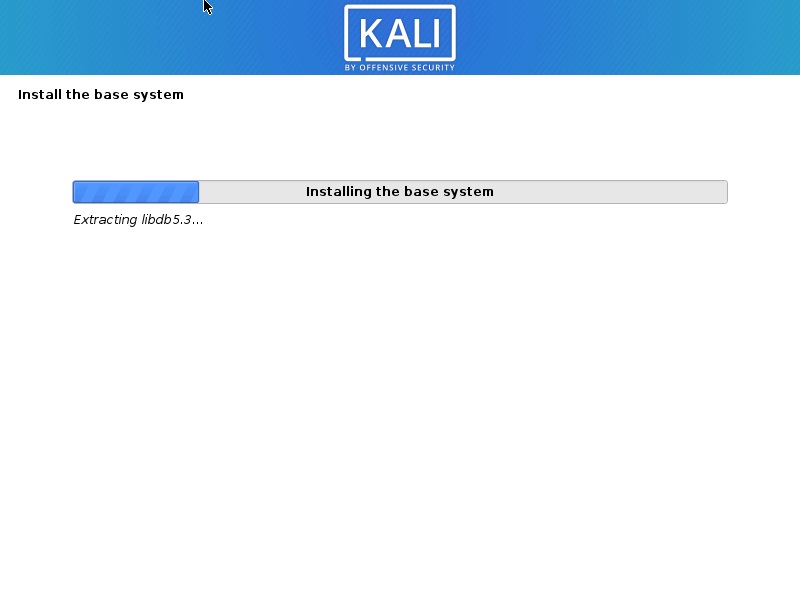
Kali Linux – Installation begins
Installation process will continue. Wait for sometime and let the process continue.
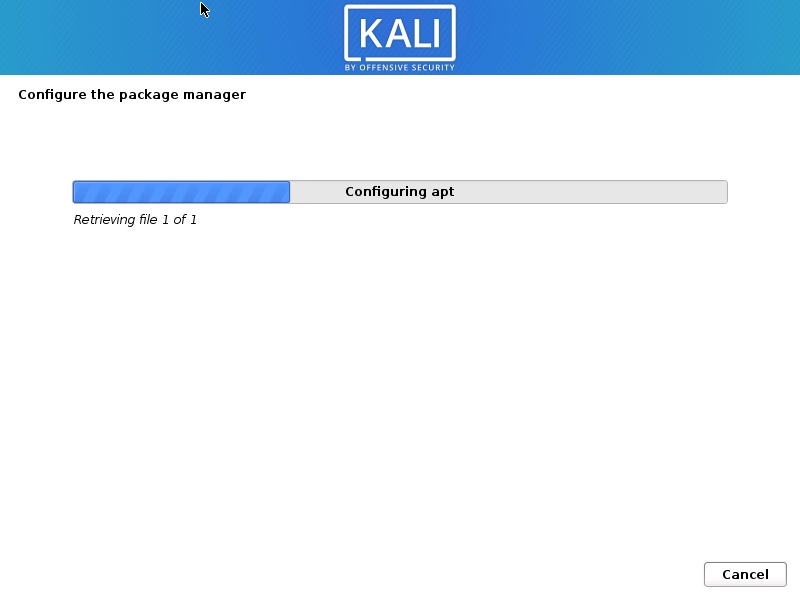
Kali Linux Installation
Installation will continue… please have patience.
Kali Linux 2020 Installation progress
Installation will continue. Wait for the process to complete. This can take a long time. So have patience.
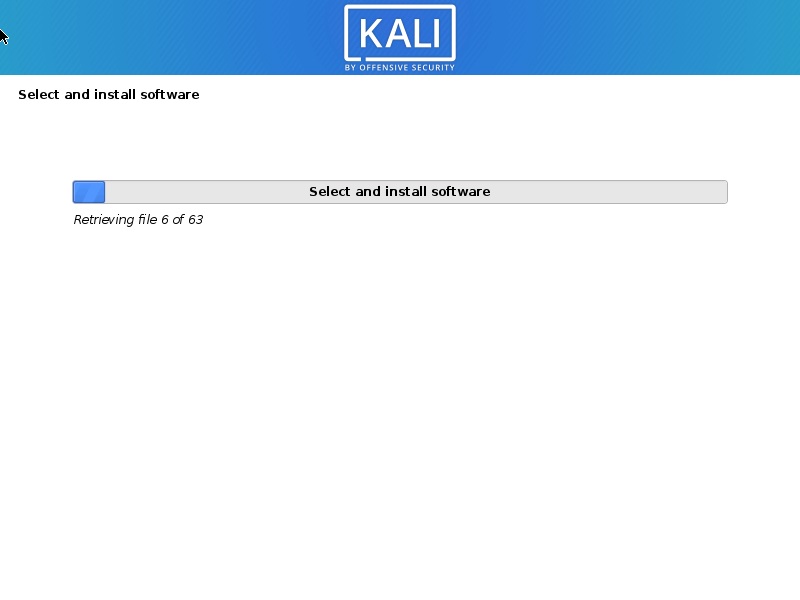
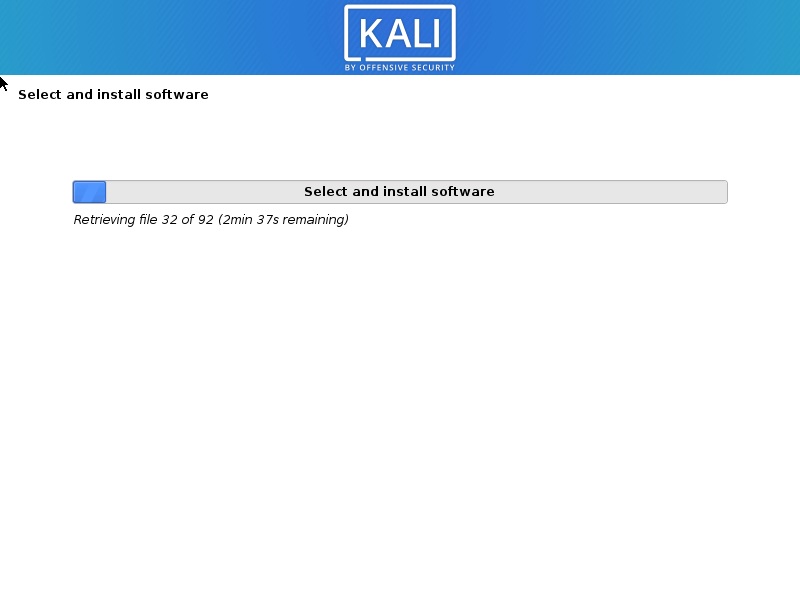
Step 24 – Software Selection
In this screen, you will have to specify what software you want to install. I accept the large, that is install all that is a part of default and additional tools. Click continue to proceed.
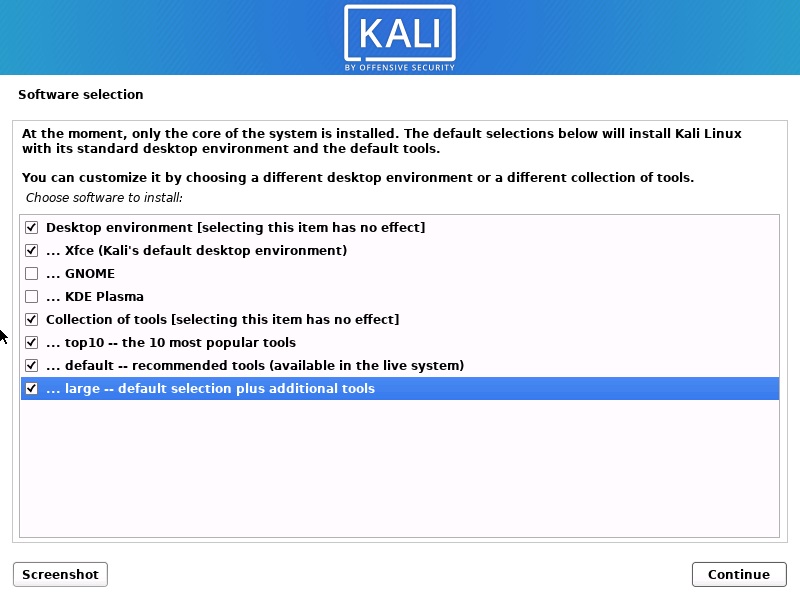
Kali Linux 2021 installation – Software selection
This step will take some time to complete. So have patience
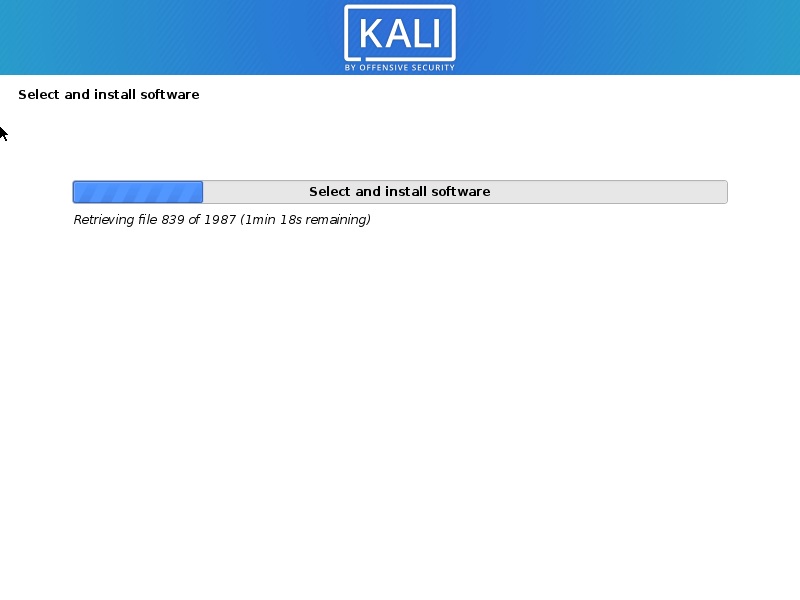
Kali Linux Installation progress
After all the files are retrieved, the installation will begin as shown in the below screenshot.
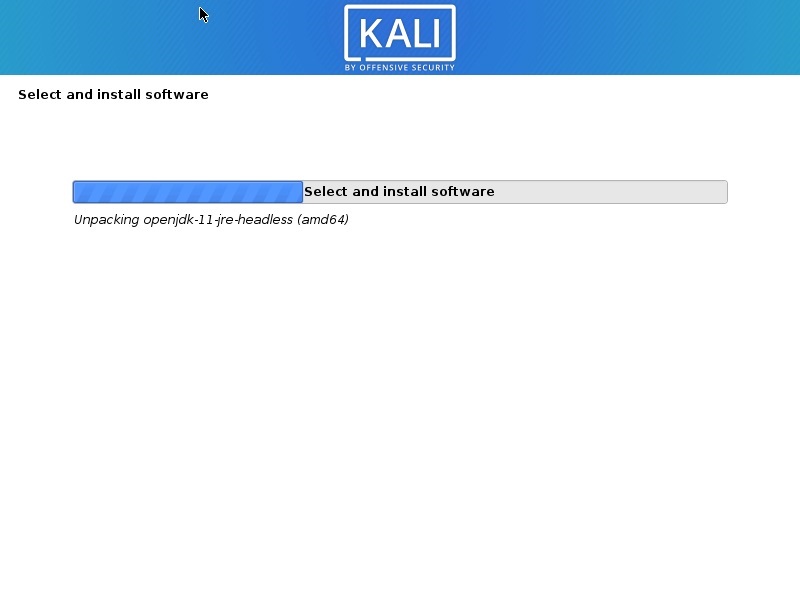
Kali Linux Installation progress
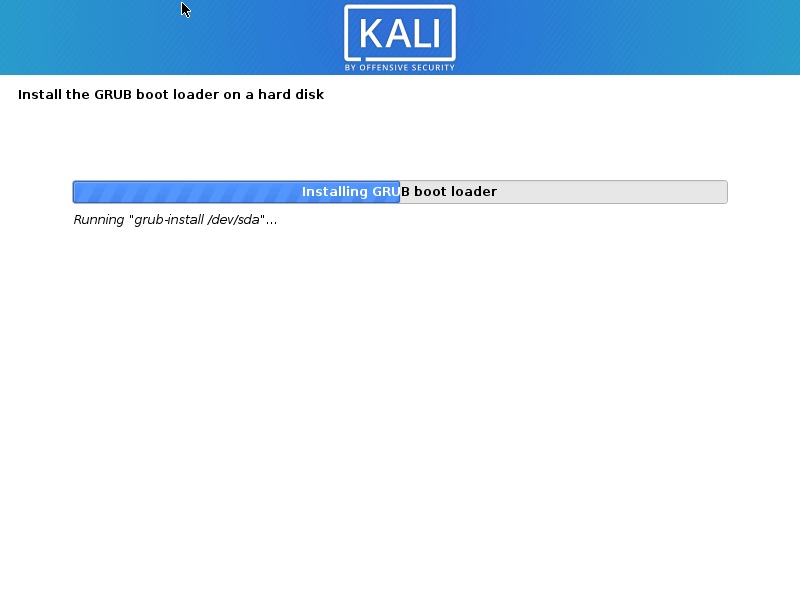
Step 25 – Install GRUB boot loader
In this dialog box you will be asked if you would like to install the GRUB boot loader. Select Yes and click Continue.
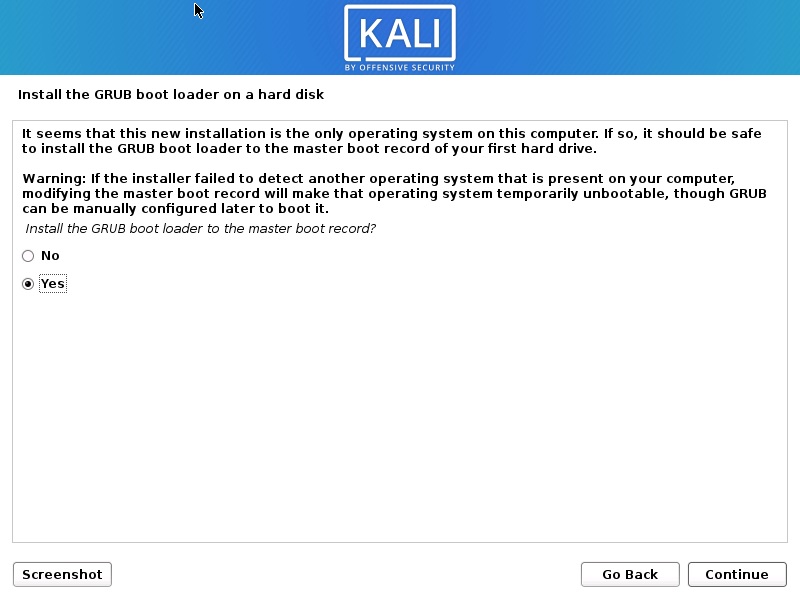
Install GRUB Boot Loader Screenshot
Step 26 – Select device for GRUB boot loader Installation
In this dialog box you will be asked to select boot loader device for GRUB installation. Select /dev/sda and click Continue.
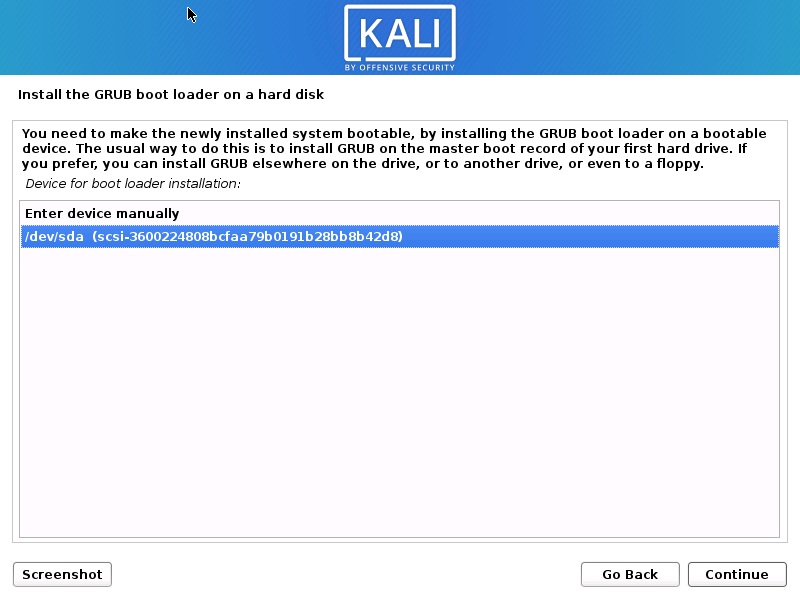
Select GRUB Boot Loader Device
Installation will continue. Wait for the process to complete.
Kali Linux Installation progress
Kali Linux Installation progress

Kali Linux Installation progress
Step 27 – Installation Complete
Installation will continue and now you will see Installation complete dialog box. Click continue to finalize the installation and wait for the VM to reboot. After reboot you will see the boot loader screen.
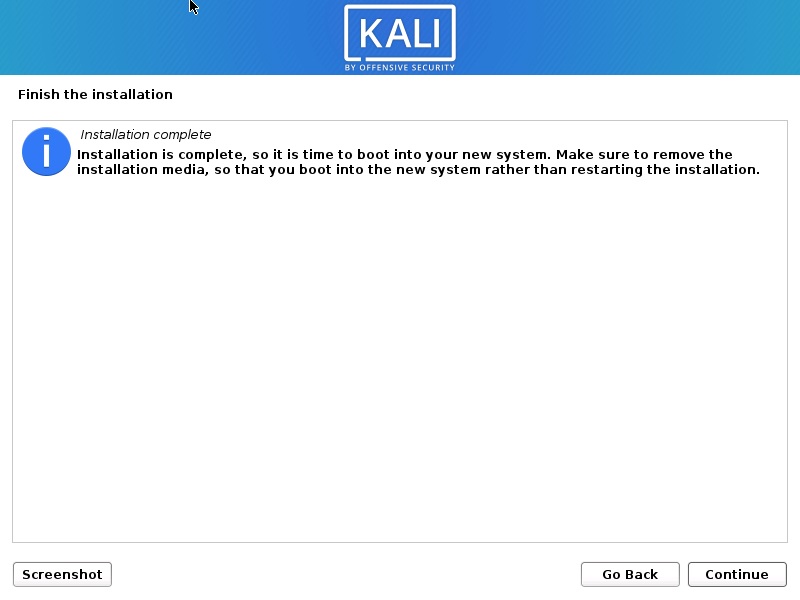
Install Kali Linux 2021 – Installation Complete Screenshot
Process Complete
After the VM starts, you will see the Grub boot loader. Select Kali GNU/Linux.
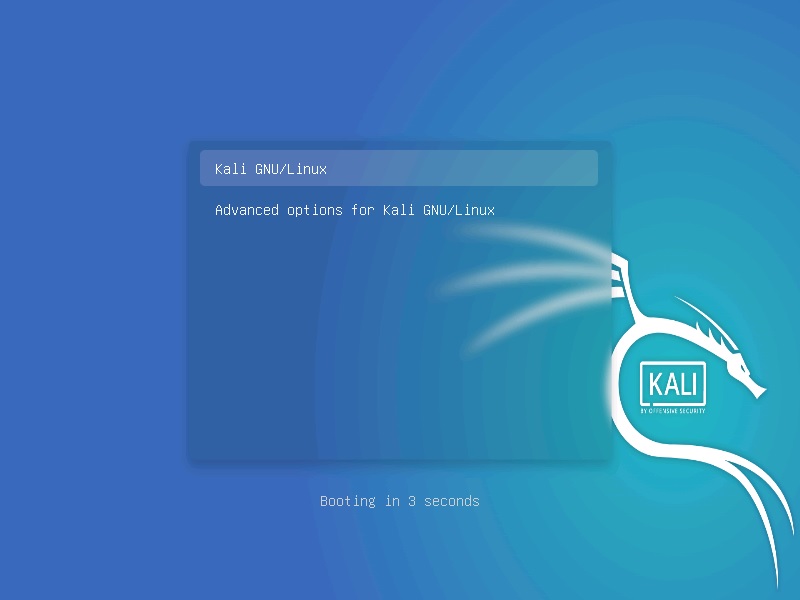
Kali Linux – Grub loader
Login with your credential you created. Enter your username and Password
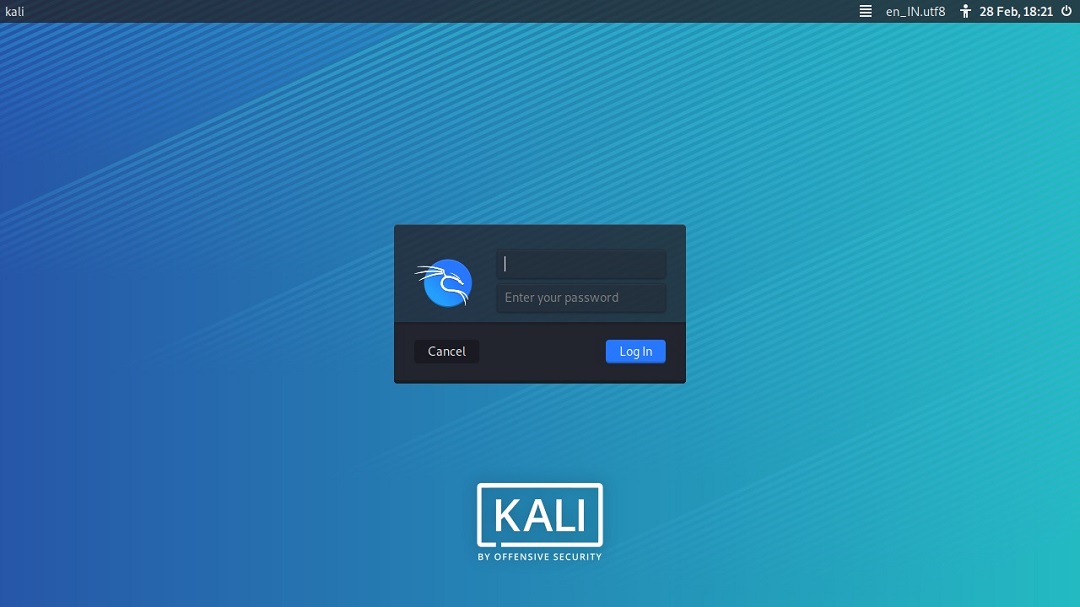
Kali Linux login screen
You will be logged into Kali Desktop 2021.
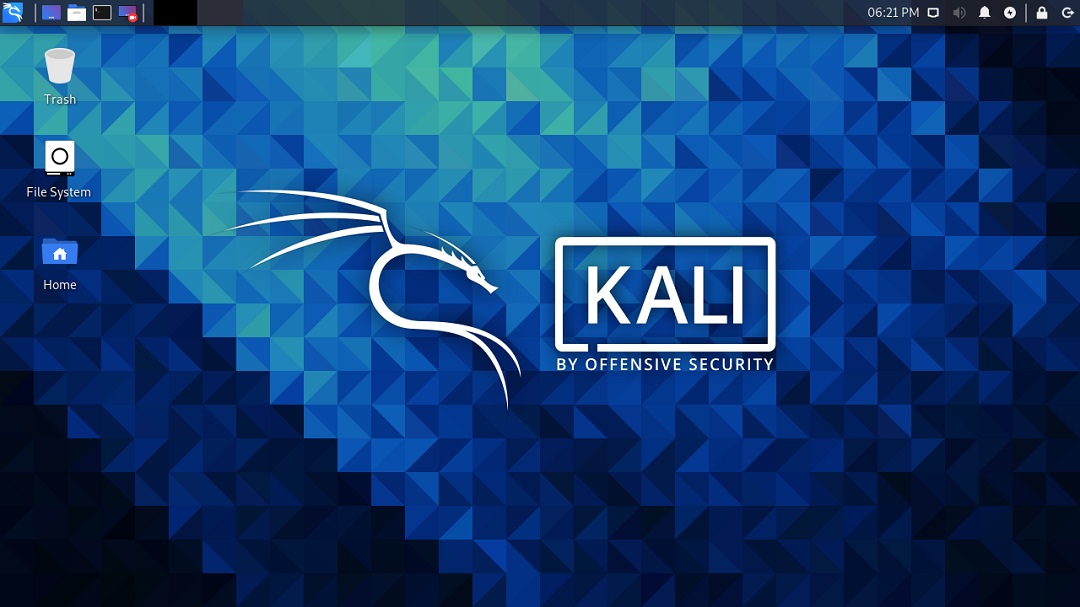
Kali Linux Desktop
Step 28 – Create root user
By default, only user account is setup during the installation stage. After installation you have to setup the root account by setting upa password for the root account.
- Open Terminal
- Type command
sudo suand enter password to gain root access - Type command
passwd rootand enter the password for the root user. You can set the password of your choice
That’s it, you should be able to login as root user.
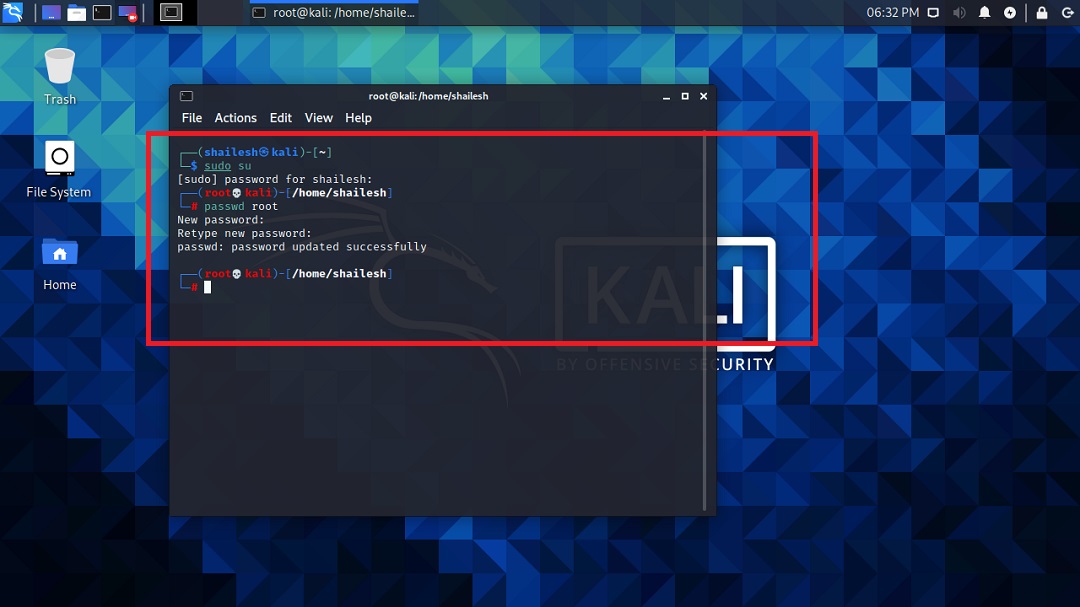
Kali Linux – change root password
Install VMware Tools (Optional for VMware 16 – Skip if you are able to switch to full screen automatically)
In VMware Player 16, VMware tools gets installed automatically. Manual steps for installing VMware tools is not required. You should automatically be able to switch to the full screen mode. Try to switch to full screen first. It should work, If not, follow the below steps, else ignore.
If you have internet connection, try this
Only this method of installing VMware tools will work for modern Operating systems. VMware now only supports Open VM tools.
- Open Terminal
- Execute the command
sudo apt-get install open-vm-tools-desktop fuse
- Enter your password
- Enter your password, if asked
- Enter Y to accept whenever asked
- Wait for the process to complete and restart. You are done. Login and now you will see the desktop in full screen mode
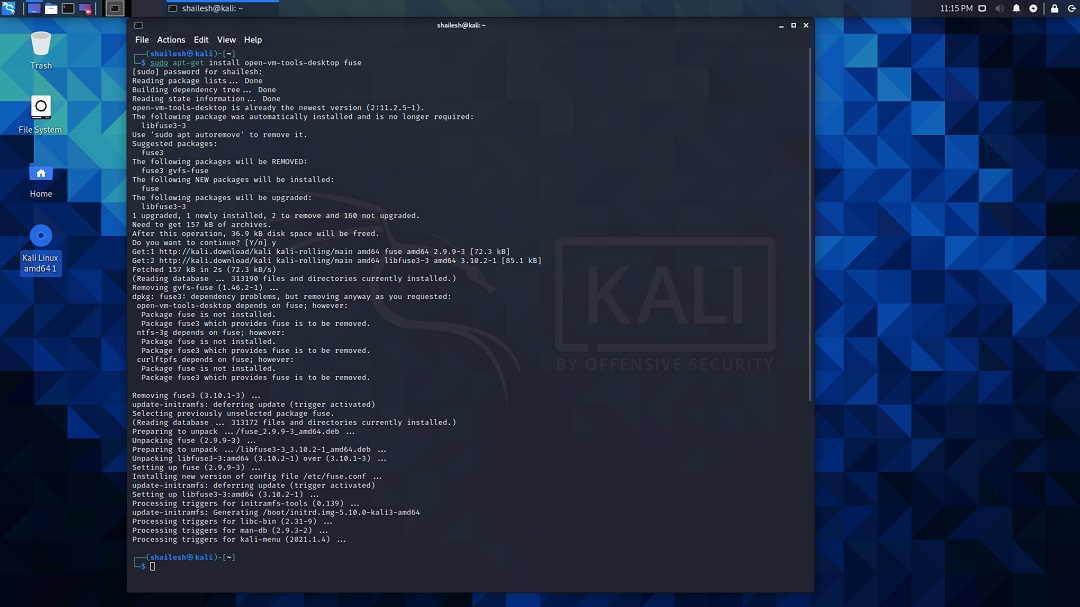
Install VMware tools
You can check the version of installed VMware Tools. In terminal, execute the command
vmware-toolbox-cmd -v
. This will show you the version number.
If you don’t have internet connection, you can install VMware tools directly from the VM. If you have internet connection, follow the next instruction which is easier.
VMware Tar Tool for Linux virtual machine is feature-frozen at version 10.3.10, so the tar tools (linux.iso) included in Workstation Pro is 10.3.10 and will not be updated. Due to this change, the Install/Update/Reinstall VMware Tools menu is disabled. Below steps worked in older versions of VMware Workstation. This will not work now for latest releases of Linux operating systems such as Redhat 8, Kali Linux 2021 etc… Please ignore the below steps for VMWare Workstation Player 16.
- Goto VM-> Install VMware Tools
- You will see VMware tools Icon on the desktop. If you don’t, then click on Places in the menu, Places->VMwre Tools. Double click to open.
- Copy the file with the file name something like this VMware-tools….tar.gz to the desktop.
- Right click on this file on the desktop and click Extract here. You will see that the file is extracted to the folder vmware-tools-distrib.
- Open terminal by going to System Tools -> terminal
- Goto the folder vmware-tools-distrib on desktop by entering the command cd /Desktop/vmware-tools-distrib
- Now run this command:
sudo ./vmware-install.pl -d
- Enter your password and press Enter. You will be asked if you want to proceed with the legacy installer. Enter Y and press Enter.
- Now you will be asked series of questions, just accept the default by pressing Enter for all and wait for the installation to complete.
- Wait for the installation to complete. You will see more prompts, except the defaults by clicking enter. Once completed, restart your VM by going to VM->Power->Restart Guest
- Once the system restarts, you will be prompted to login. Once you login, you can see the desktop in full screen mode which stretches up to the complete screen.
Process Complete
You are done, You can start working on Kali Linux 2021. Thanks for Visiting my blog.
Kali Linux Desktop

It works well! Thanks for your useful post.
I just installed Kali Linux 2022.2 in VMware Workstation Player 16. It was a breeze!
I have installed Kali 2022.2 but the text size and everything is too small. I am using VMware Fusion on Mac. Please help how can i fix this.
after seclect and install software mine in showing somethis else it is telling insert the medial lebeled ‘kali gnu/linux 2021.2rc3 _kali-lastsnapshot_ -official amd64 NETINST with firmware 20210528-08:55’ and press enter. please help me in this
Great article! i had problem with wirtualbox 6.1 on windows 7. dialogs with errors to run kali. On vmware working without problems, but don’t see wifi card to wifite. do you have sugest how fix this problem?
How to login as root user instead of other users?
Which one is better place to install like VMware,virtual box etc
stuck at step 12 after clicking on ‘graphical install’ from kali Linux installer menu(BIOS mode) a black screen is displayed and its stuck there. Not proceeding further . Please guide what to do to solve this issue.
Try to setup using the Official Kali Linux Image. It will get you started easily.
https://shaileshjha.com/use-kali-linux-official-image-to-install-kali-linux-in-vmware-virtualbox/
The steps are very perfectly shown with the a detailed description .Any lame person can easily understand ,very useful
Thank you so much sir❤️
thanks alot..it was very helpful.
Worked like a charm! Thanks for that very detailed installation. First time VM & Kali user.
thanks very much for this!
I very much appreciate your effort
Thanks for this great help
But I choosed desktop envirment on installation.
Tell me how to install all software later
Great Guidelines sir, i have installed Kali Linux completely without any problem, but is there any way by which we can acces the Whole Hard drive data from the virtual machine, although we have only selected 60 GB for installation but can we use the rest of Hard disk which is for windows.?
Sir, before configure package manager http proxy, it is asking to select a mirror for debian archive. I selected India but is is showing an error. What do I do?
please, im encounering a problem in the configuration phase presisely during the “Configure the Package Manager”. it is requesting me to choose a debian archive mirror country and i cant find my country there (Nigeria). so how will i go about it
Choose the default location or any location and go ahead. Mirrors are download locations. If it is not available in your region, it does not matter, other mirrors will work just fine.
I tried all the locations after reading this but it is still showing error in mirror for debian archive.
Great job. Step by step instruction was really very useful to many of us to get it done successfully. Appreciate your effort.
sir, i followed all the procedures and i was able to install kali successfully but im not able to access files from my root directories in kali linux. the file manager is empty and i have some .deb files i downloaded to my pc
i have successfully finished the first phase of the set up but i am recieving an error message when im trying to open the os
==================================================
this is the error message i recieved
==================================================
Error while powering on: This host supports Intel VT-x, but Intel VT-x is disabled.
Intel VT-x might be disabled if it has been disabled in the BIOS/firmware settings or the host has not been power-cycled since changing this setting.
(1) Verify that the BIOS/firmware settings enable Intel VT-x and disable ‘trusted execution.’
(2) Power-cycle the host if either of these BIOS/firmware settings have been changed.
(3) Power-cycle the host if you have not done so since installing VMware Player.
(4) Update the host’s BIOS/firmware to the latest version.
This host does not support “Intel EPT” hardware assisted MMU virtualization.
Module ‘CPUIDEarly’ power on failed.
Failed to start the virtual machine.
==================================================
please what can i do to resolve it
You have to enable Intel-VT in Bios. Please follow my post
https://shaileshjha.com/step-by-step-guide-to-enable-intel-vt-x-or-amd-v-in-bios-or-uefi-in-windows-10-and-windows-8/
Or install using 32 bit version installer of Kali Linux.
thank you sir, i was able to do it successfully
Thanks alot! Your blog is a treasure for a newbie like me
Hey thanks a lot for your comment.
Regards,
Shailesh
do u know how to start wlan0 in here?
Hi Steve,
Can you please tell me what you are trying to do?
Are you trying to connect to internet after logging in to Kali Linux using VMware using a WiFi card? If that is the case, I can access Internet using NAT Network type. Go to VM settings and under Network make sure that it is using NAT.
Let me know if your issue is something else.
Regards,
Shailesh
I guess the problem is with the onboard WiFi card which does not normally get detected in the VM. People normally use external USB WiFi card with Kali which get detected by Kali inside the VM via USB. Unless the WiFi device gets detected by kali, it will not show up in iwconfig and hence no wlan0.
I tried to install Realtek drivers for WiFi for kali, but still it does not work.
If you plan to use external USB WiFi card, make sure that it is supported by Kali.
do u know how to start wlan0 in here???
thx man!!!
In installation software selection I want everything complete kali Linux 2020.1a so which-which options I have to choose because if I choose every option in the list so after the 2-hour installation was canceled so please tell me and if it is possible to share a screenshot so share to the which-which option I have to tick to complete everything installation
Thanks for this tutorial
Sir,
I did install Kali, I was successful logging in. But when I turned my laptop off and reopened, VMware showed no virtual machines.
And this happened twice. Help me sir
I hope you are aware of the location where os is installed in vmware. Just open manually via VMware and you are done.
Thanks worked perfectly!
Hi. Nice blog .. very helpful I have a question I get to step 24 install and it starts but at about 11% it stops and says failed step return to menu and pick failed step to start over I do it a couple of times with same results any ideas.. try re download from Kali site but still the same result . Well thank you very much if you get back a million thank you.
Hi Edgardo,
It is difficult to troubleshoot these issues remotely. I would recommend an alternate method. This will get you started quickly.
Use the official Kali Images for VMware or VirtualBox to setup Kali Linux. Please follow my post on how to do it.
https://shaileshjha.com/use-kali-linux-official-image-to-install-kali-linux-in-vmware-virtualbox/
when i want to insttal the system it’s keep teeling me the installation step failed
why that !!!
Thanks For help
Great step by step instructions, saved me a lot of time so big thanks!
Thanks a lot Mike.
thnk a lot man but why i have the iso amd kali icon on my vm kali desktop ??
Thanks for this tutorial, it works perfectly to the tee and you explained everything so well. Bless you my friend!